
I Buried Wood in My Pots. Here's Why Every Plant I Own Is Thriving.
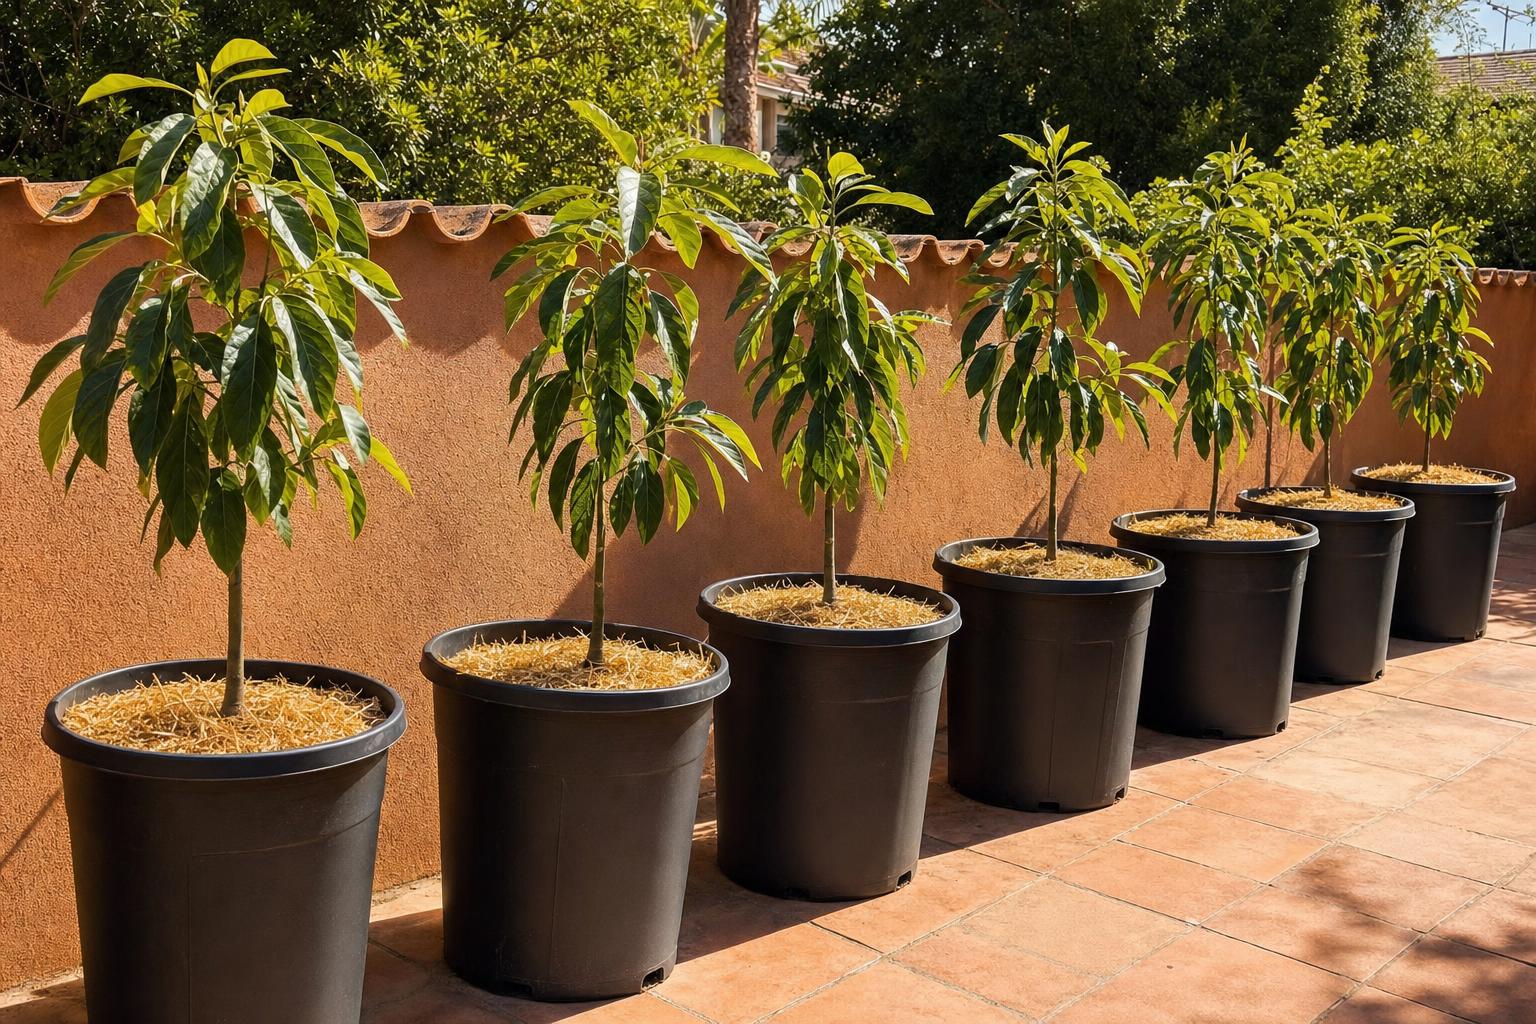
Twenty pots. Twenty avocado and moringa trees. One ancient Germanic technique adapted for modern container gardening. This is what hugelkultur looks like when you stop following the rules.
Disclosure: Some links in this article are affiliate links. If you purchase through them, we may earn a small commission at no extra cost to you. We only recommend resources we genuinely believe in.
The nursery pots were sitting empty in the sun, lined up in two rows against the wall. Twenty of them. Twenty-gallon black plastic, the heavy kind that holds heat and bakes roots if you're not careful.
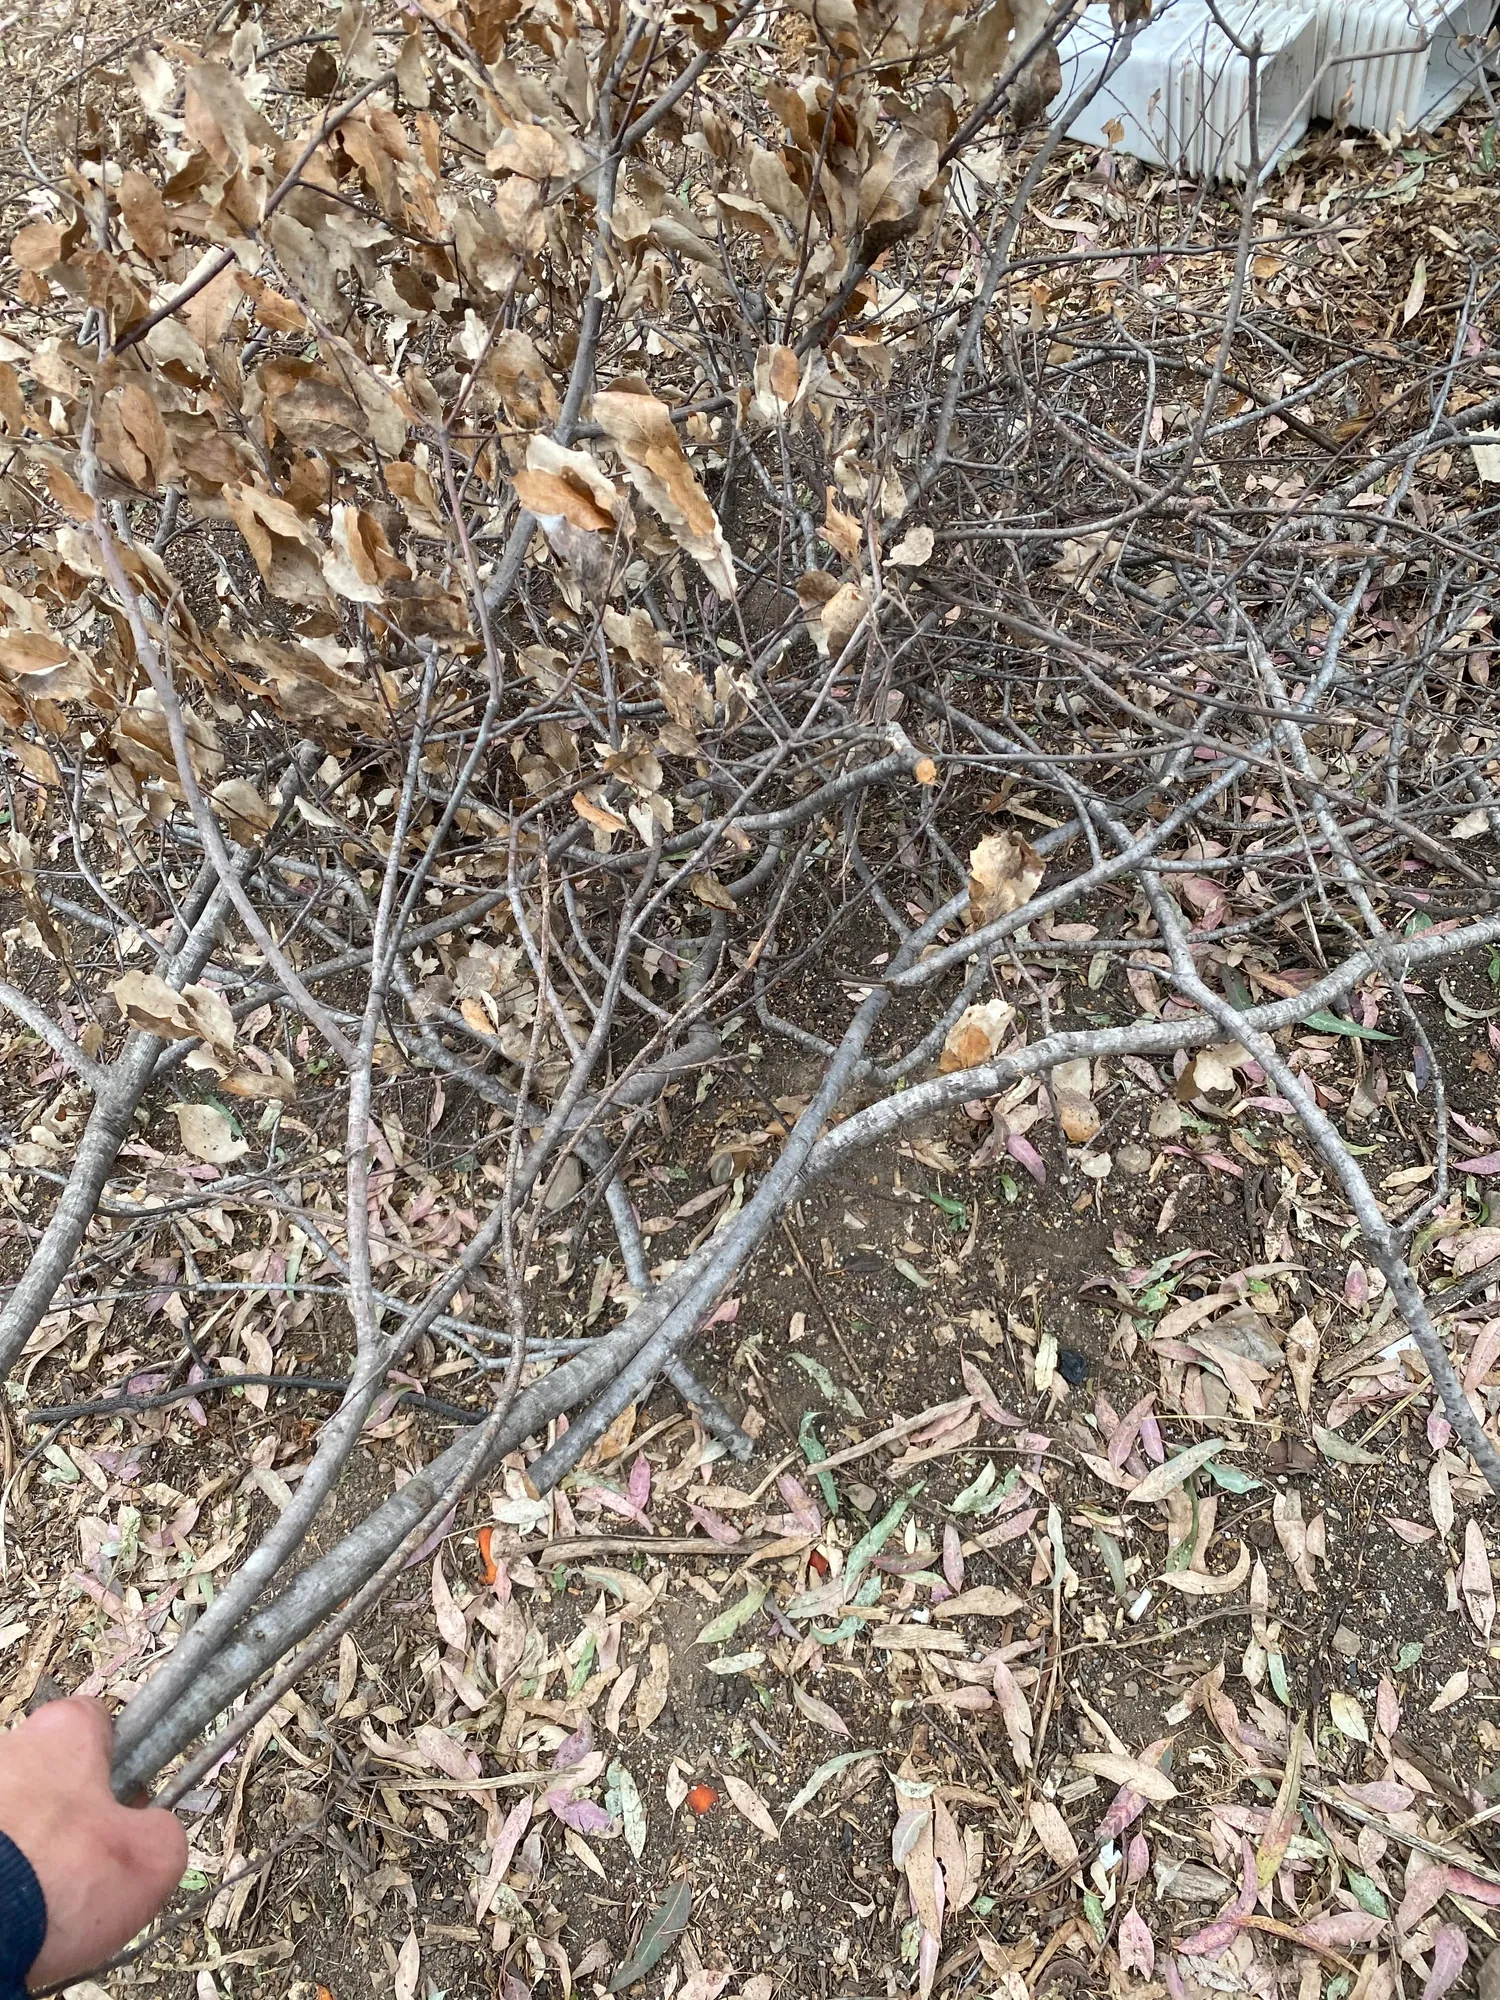
I had avocado seedlings waiting in shade. Moringa cuttings in coco coir plugs sitting in a tray. And a pile of thick oak branches I'd just cut back from a dying shrub in the corner of the yard.
Most people would have bagged those branches. Called it yard waste. Dragged them to the curb.
I buried them instead.
What Is Hugelkultur, Exactly?
The word comes from German — Hügel means hill or mound, Kultur means culture or cultivation. The practice is old. Generations of Central European farmers built mounded garden beds by burying logs, branches, and wood debris under layers of compost and soil. The wood decomposed slowly, year after year, releasing nutrients and acting as a hidden water reservoir underground.
The beds didn't need much irrigation. The wood held moisture the way a sponge holds water — absorbing it when there was plenty, releasing it slowly when things got dry.
Traditional hugelkultur beds are enormous. Two meters tall. Built to last a decade.
I live in Southern California. I don't have the space or the ground.
So I put it in pots.
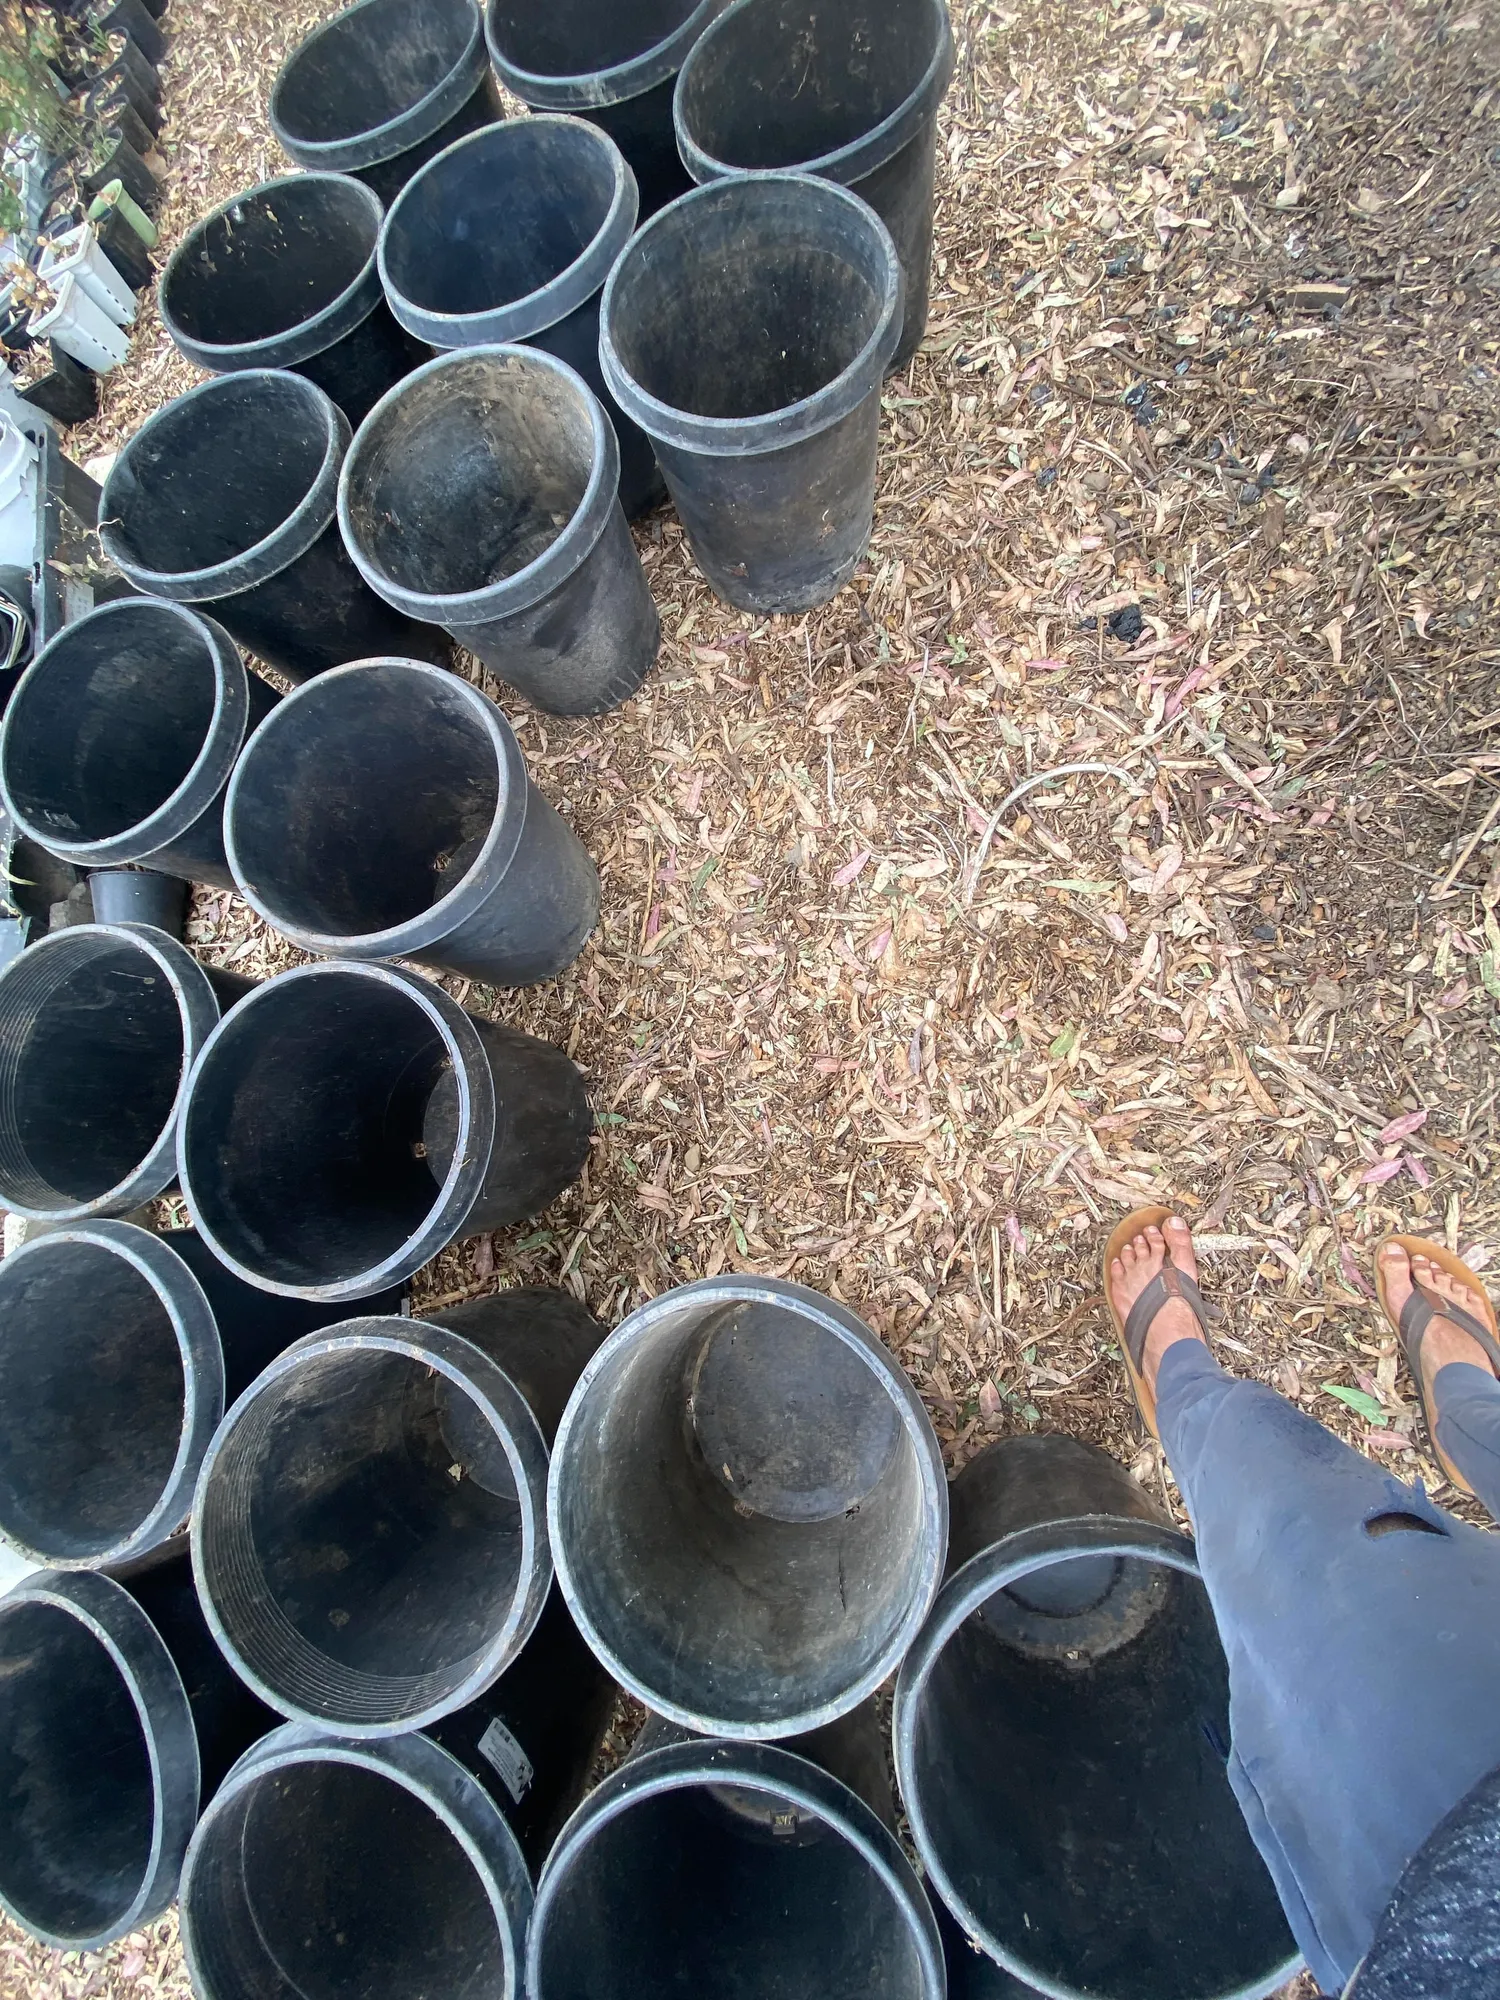
The Oak Branches That Started Everything
The wood I used was oak. Not by accident — oak is one of the best choices for hugelkultur because it decomposes slowly. That's exactly what you want. Fast-decomposing wood breaks down in a season. Oak branches at the core of a pot will still be working in year two, year three, maybe longer.
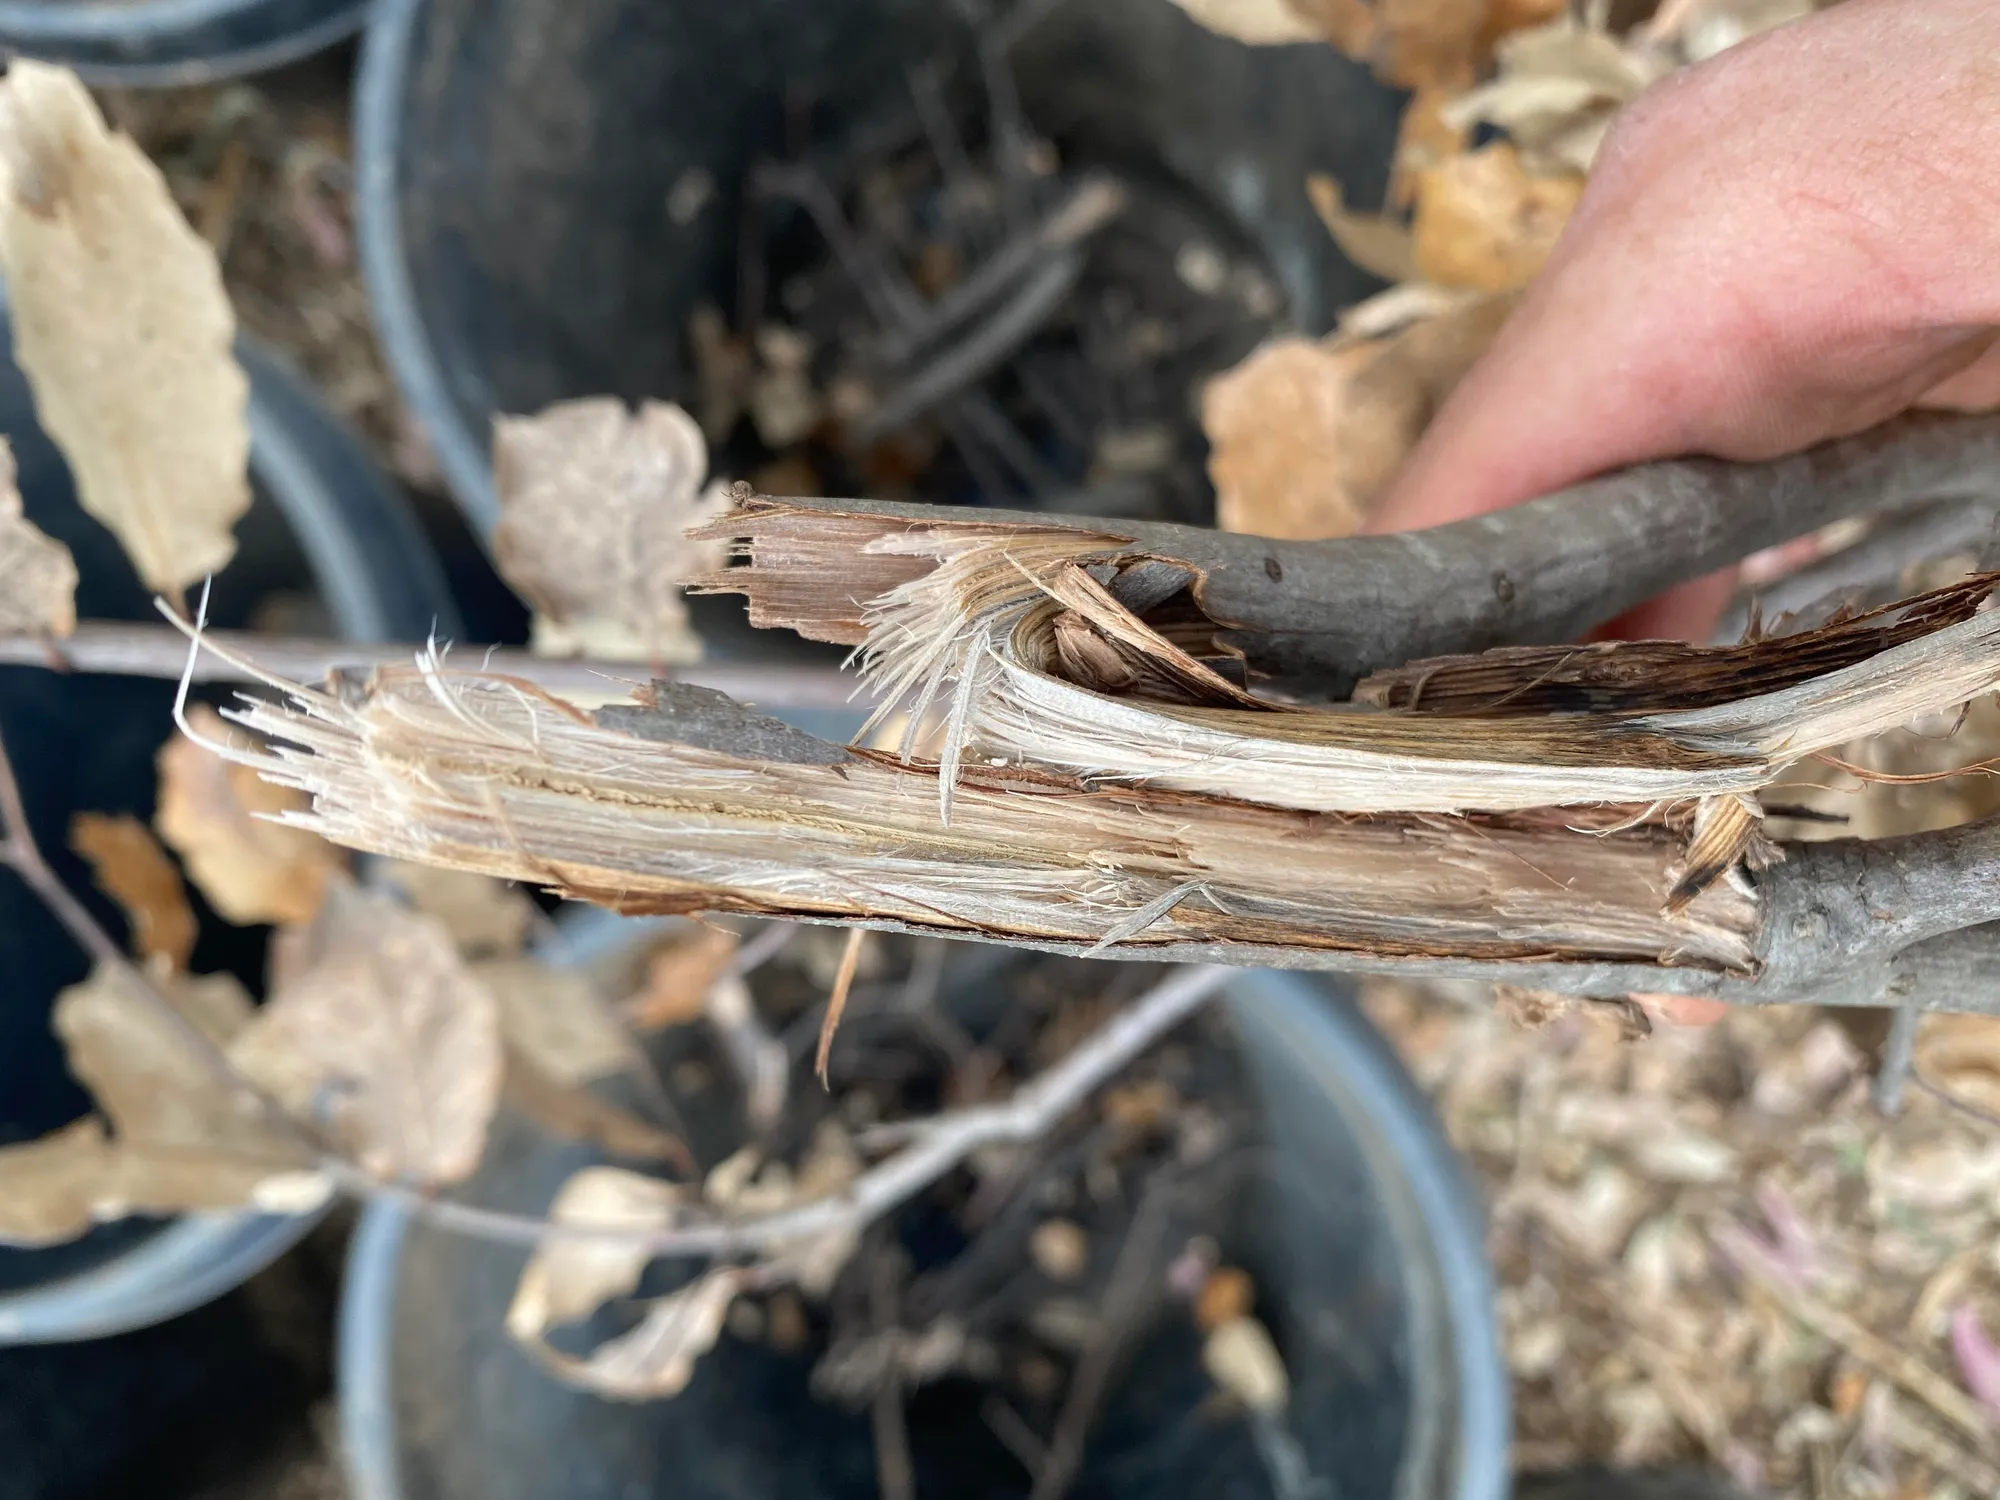
I had thick branches, not twigs. The ones that had been holding up the canopy for years. When I split one open, you could see the dense grain, the solid rings. That wood has structure. It holds.
Why Wood Is a Sponge (The Science Nobody Talks About)
Here's the thing they don't tell you in most gardening guides.
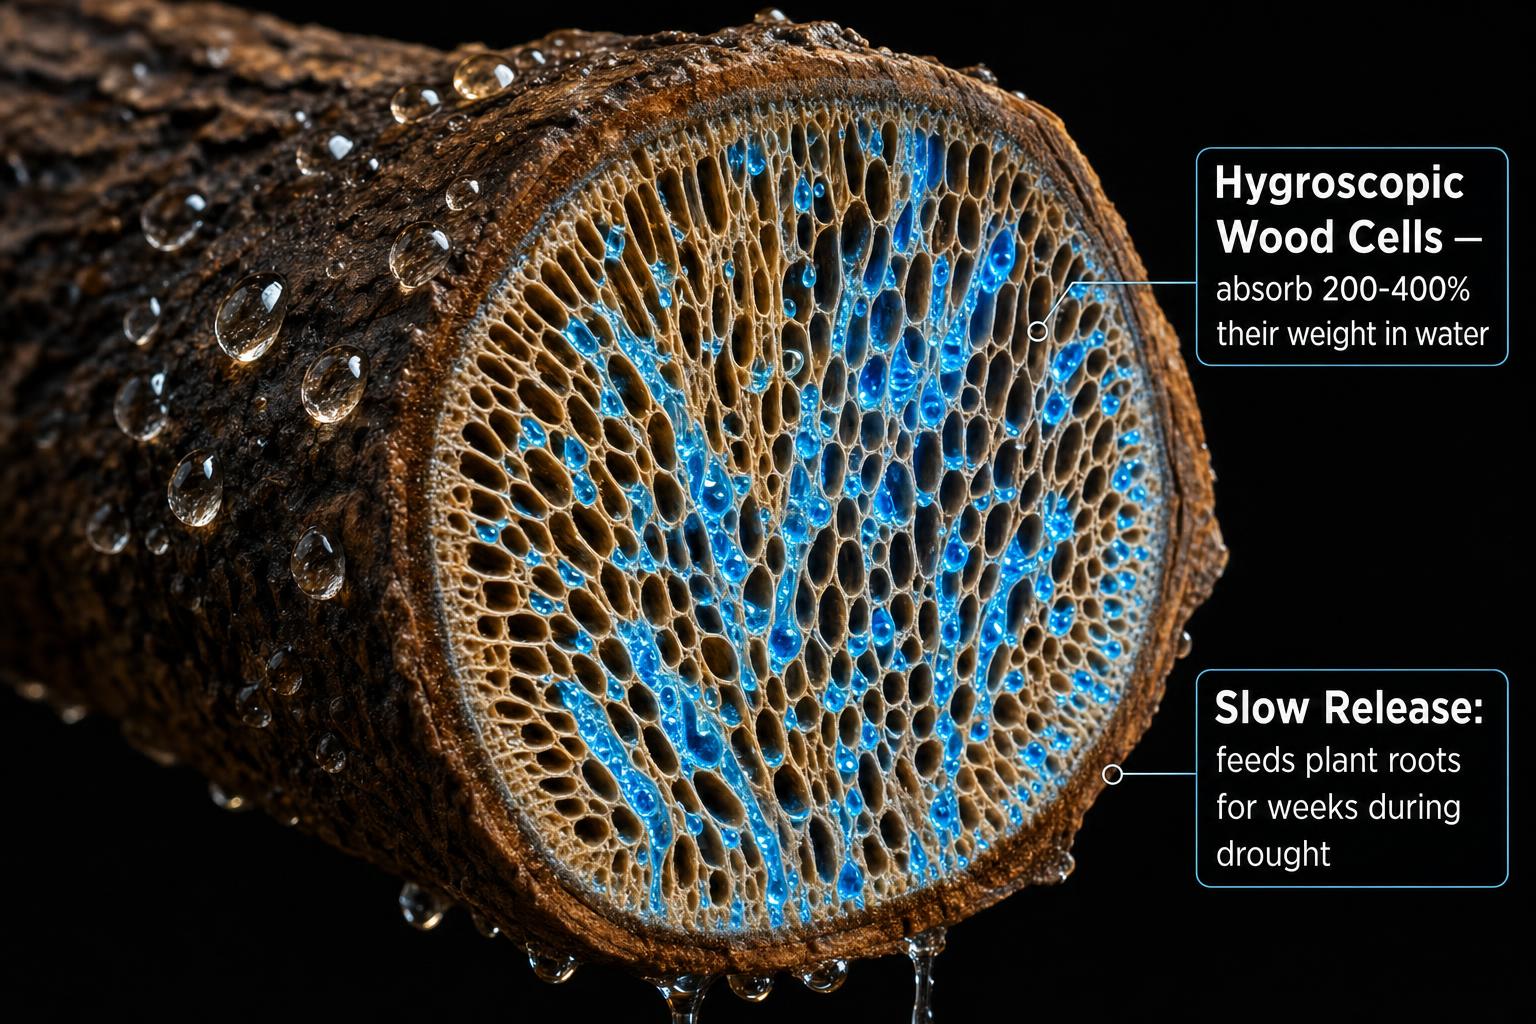
Wood is hygroscopic. That means it actively absorbs water from its environment. The cellular structure of wood — xylem, parenchyma cells, the vast network of channels that once carried sap through a living tree — doesn't disappear when the tree dies. Those channels remain. And they absorb.
Large oak branches can hold 200–400% of their dry weight in water. That's not a rounding error. That's a transformation. A branch that weighs 500 grams dry can hold 1–2 liters of water inside its cells.
In a pot, buried under compost and soil, that branch becomes an underground cistern. When you water, the wood drinks first. Then it releases that water slowly, over days, into the root zone. During heat waves. During the stretches between waterings when you forget, or you're traveling, or the summer just gets away from you.
The wood also creates air pockets as it settles and partially compresses. Air in the root zone means drainage. Drainage means avocado roots don't sit in standing water. And that distinction — between moist and waterlogged — is the difference between a thriving avocado and a dead one.
Filling the Pots
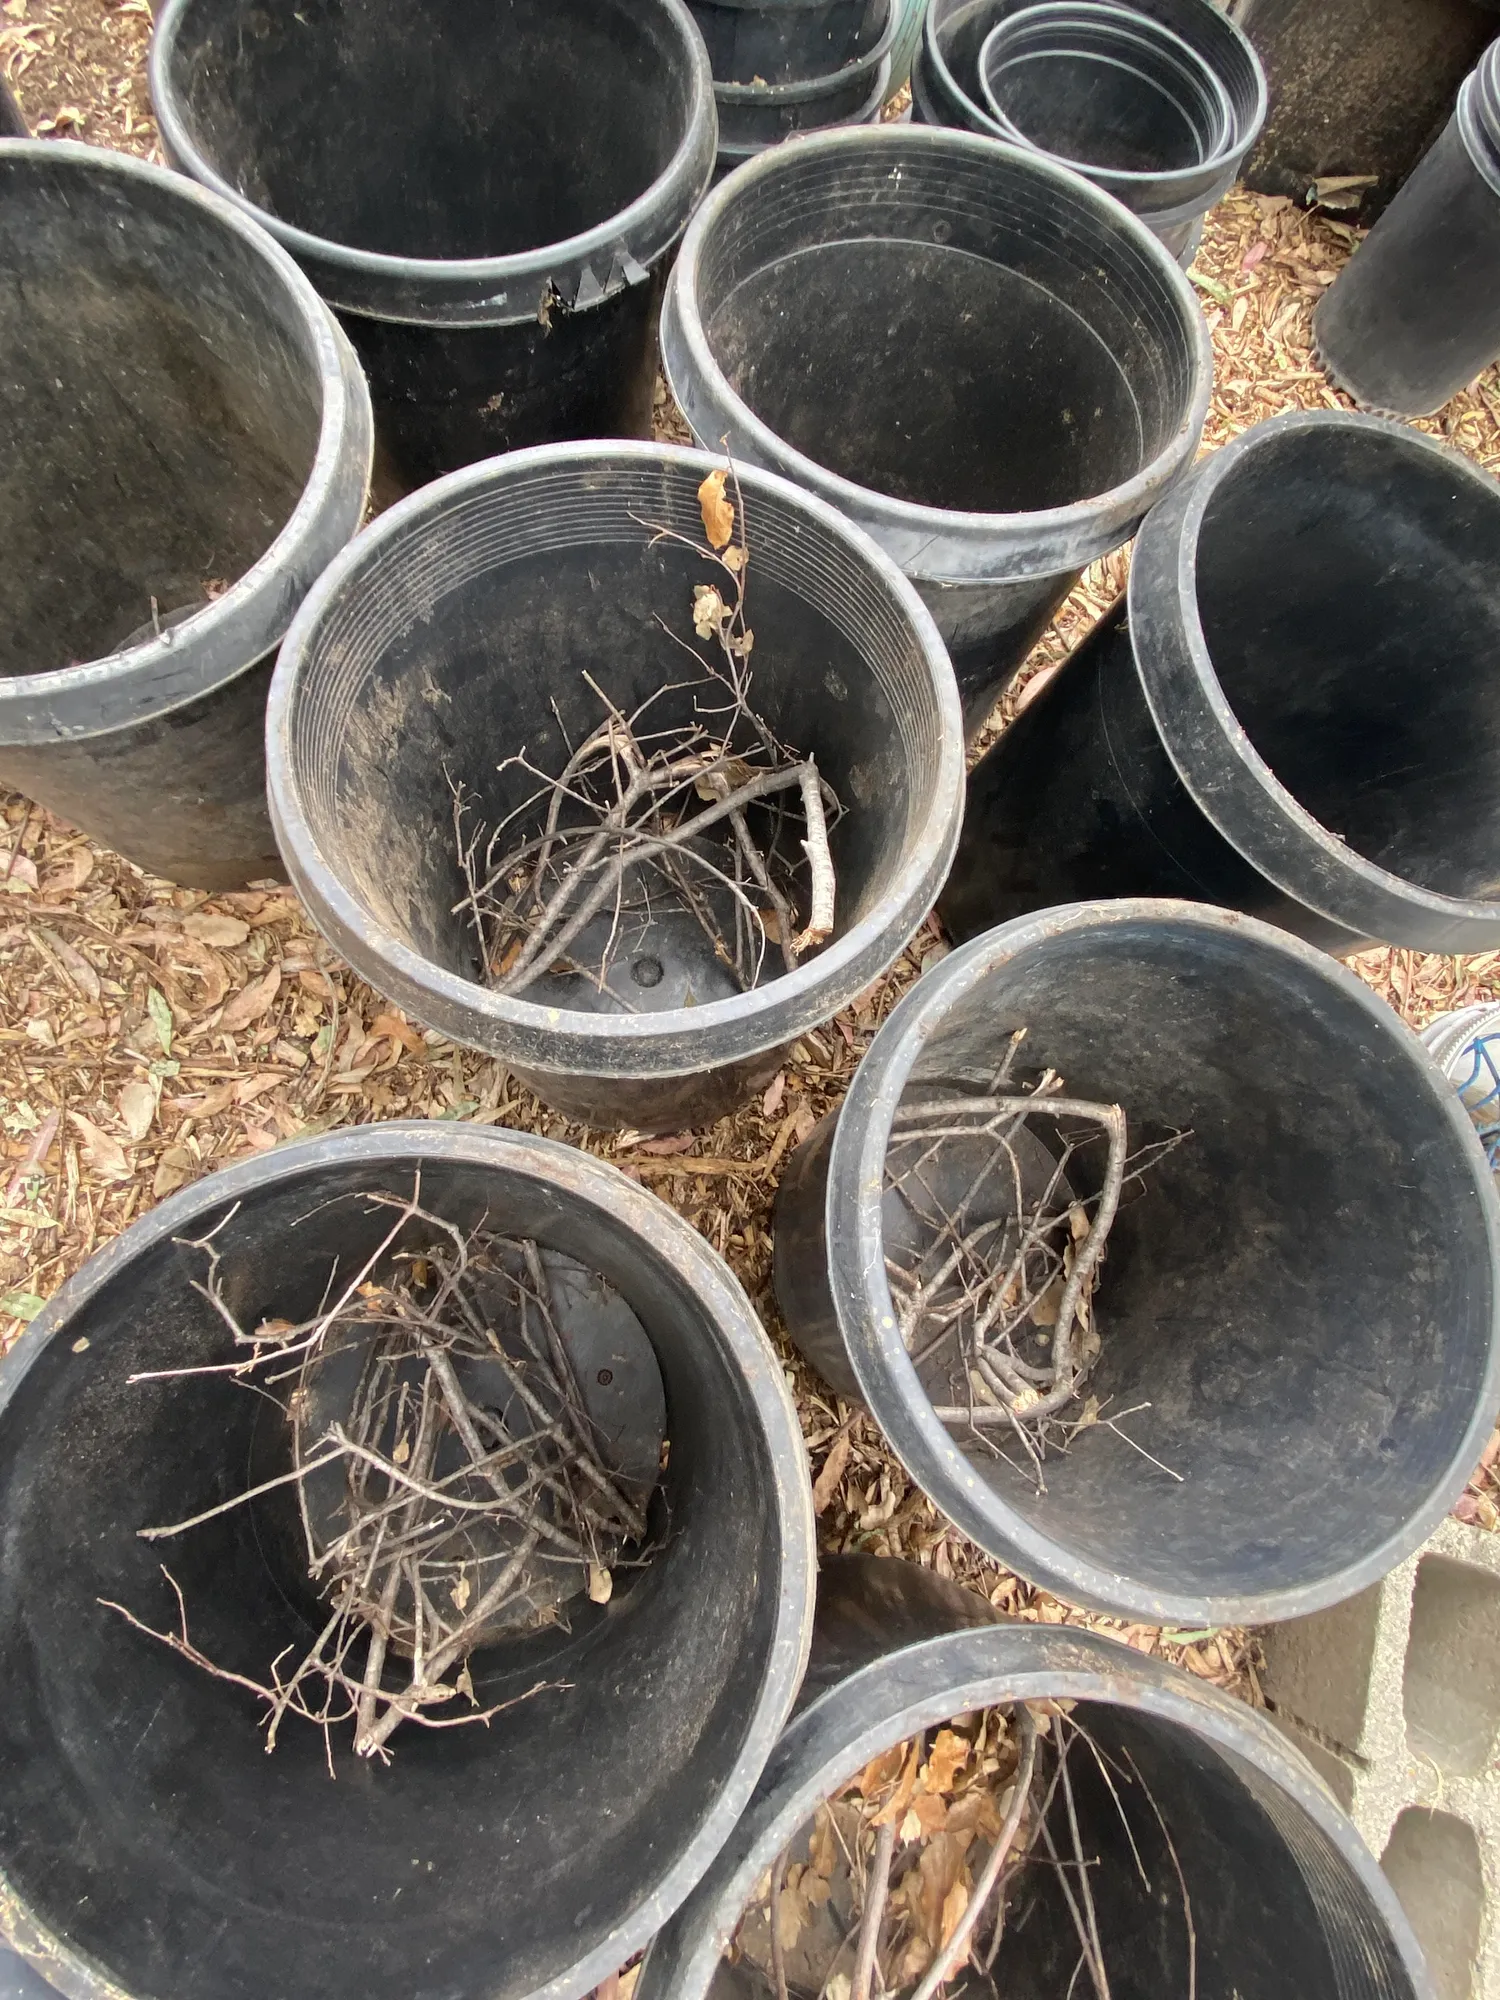
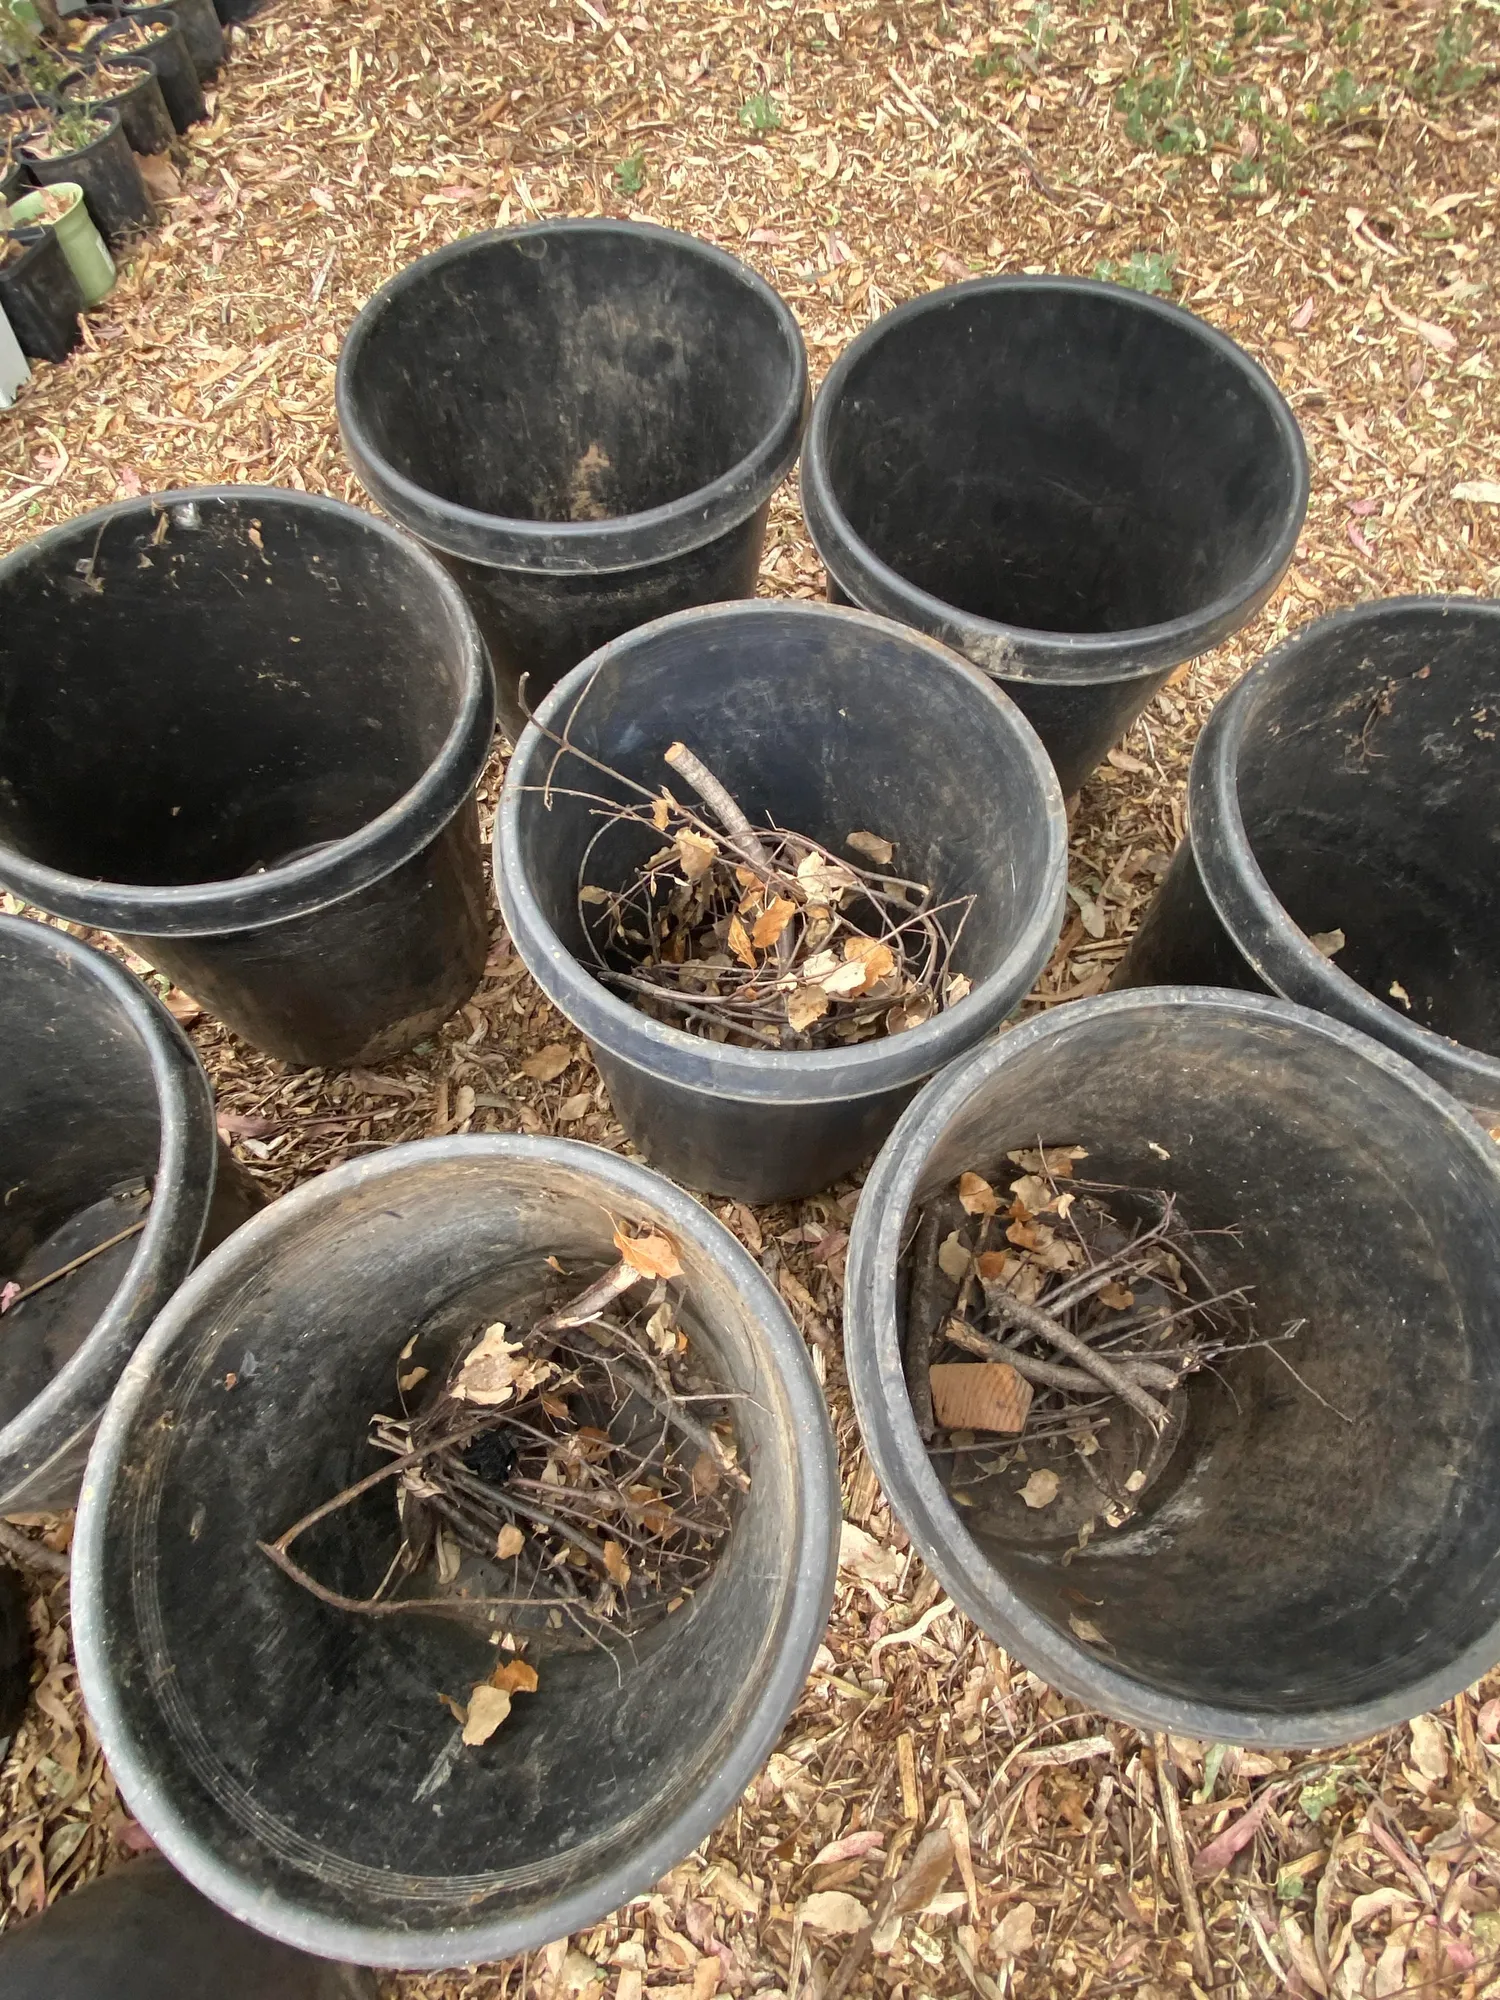
I laid the branches first. Thicker ones on the bottom, filling the bottom third of each pot. Some I had to break to fit — that's fine, more surface area exposed means faster initial moisture absorption. I didn't worry about precision. I worked quickly, moving from pot to pot, the wood landing with a hollow thud each time.
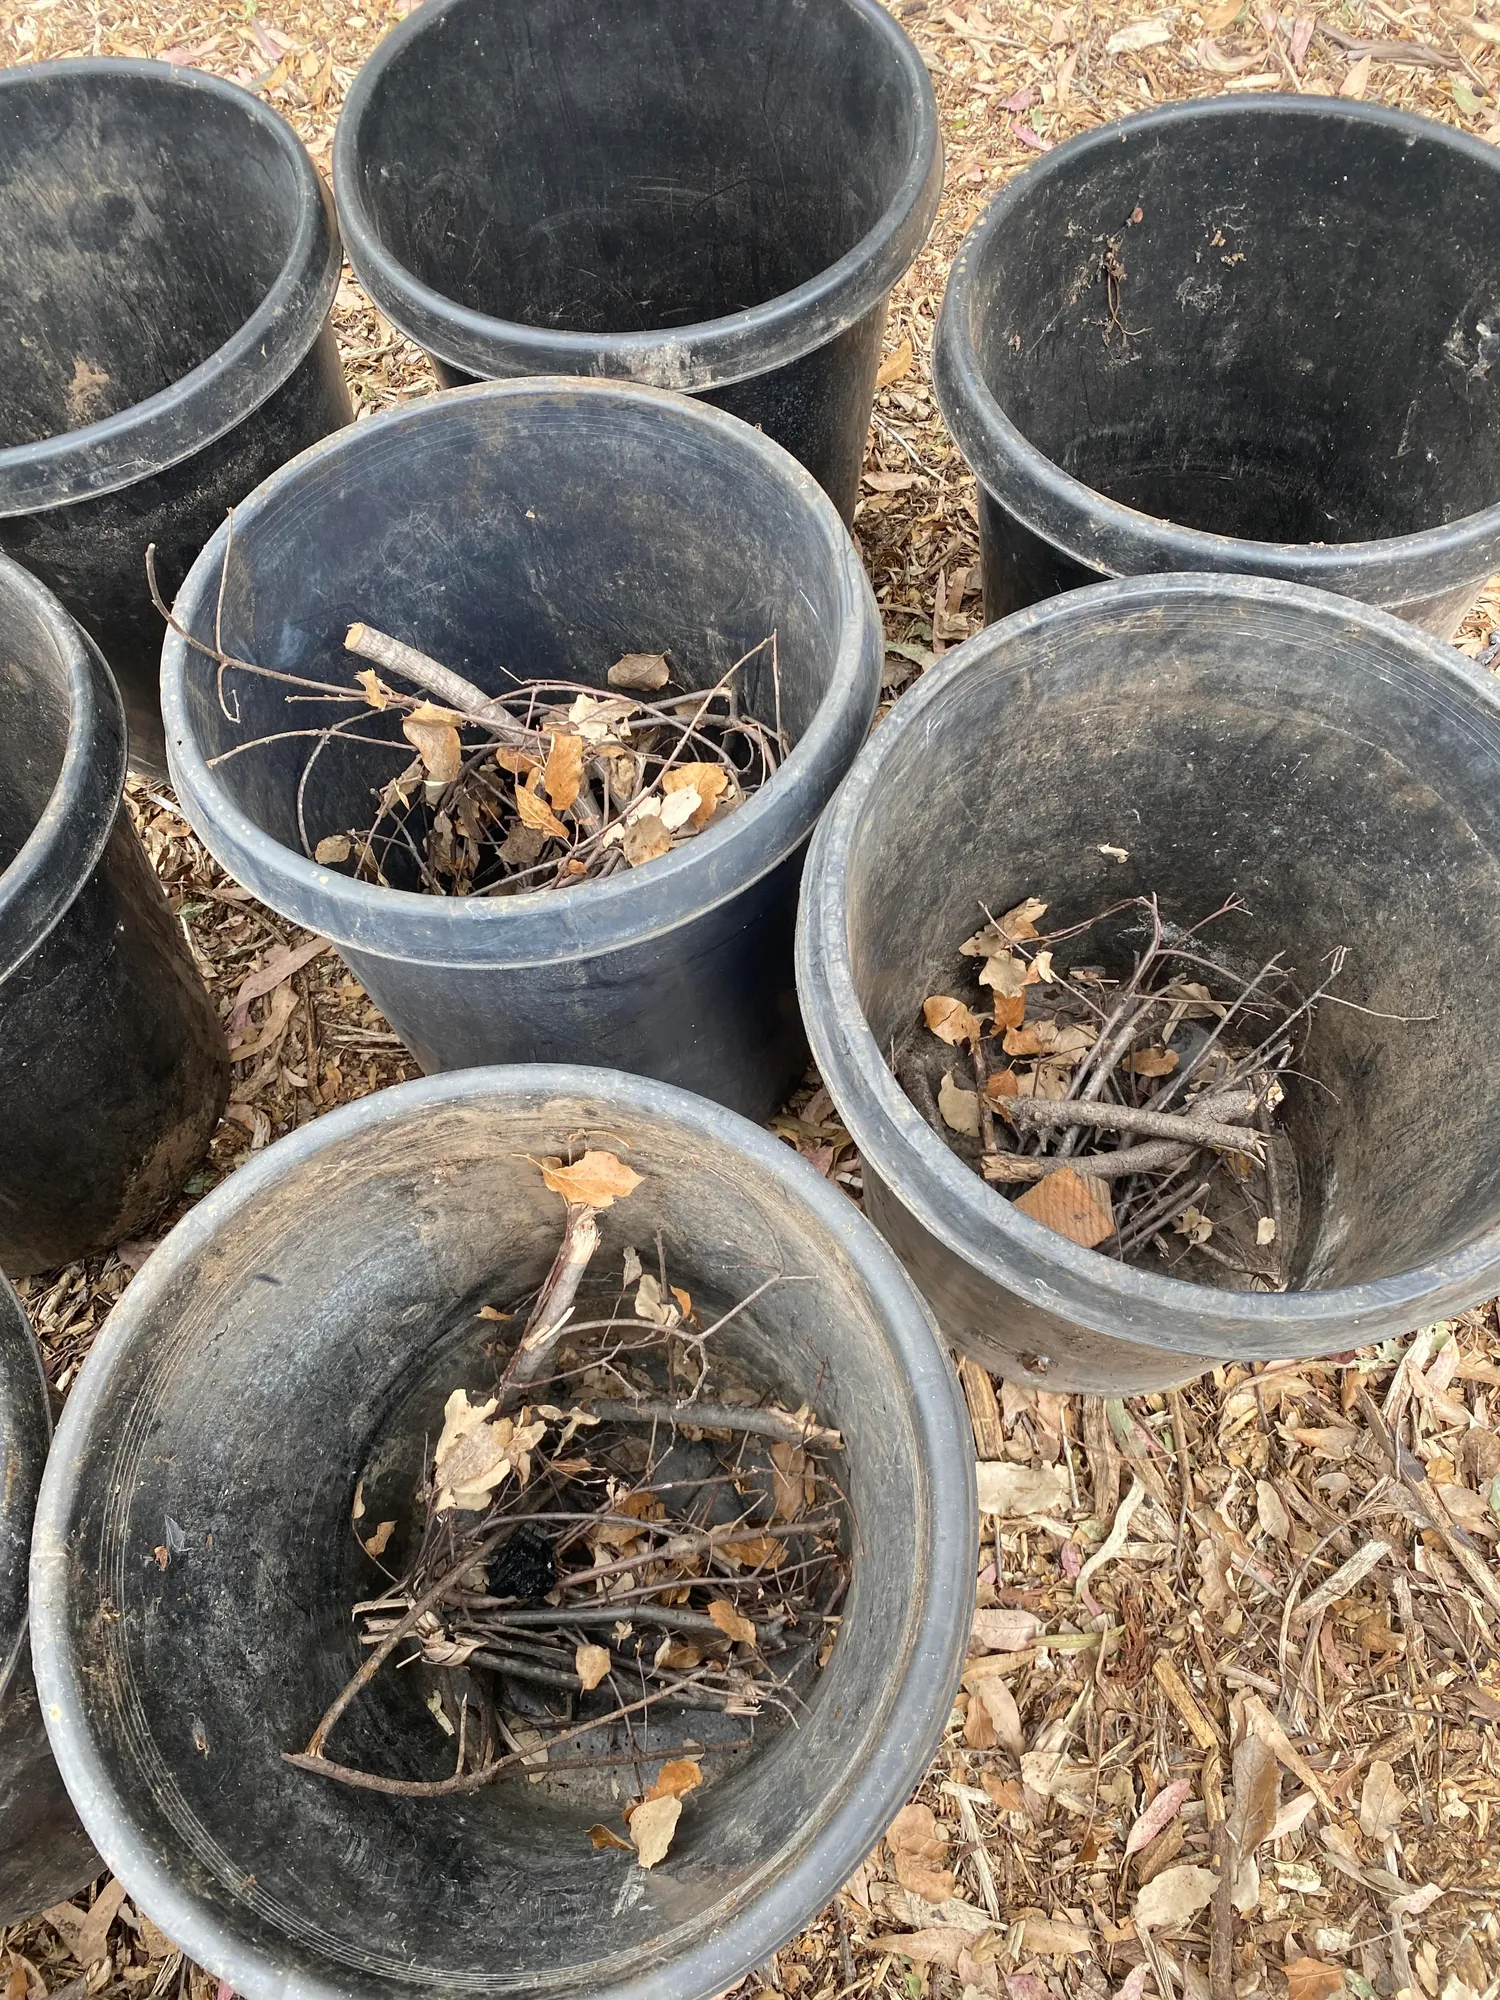
Then wood chips over the branches. A couple inches. This layer fills the gaps between the big wood and starts transitioning toward finer material. It breaks down faster than the branches, adding a nitrogen gradient as it does.
Then compost. Dark, earthy, teeming. I was liberal with it. Mixed in some granular organic fertilizer at this layer because the first months in a new pot are hungry months — before the wood has really started breaking down and contributing nutrients, the plants need something available now.
Then soil — a good loamy mix with some coco coir blended in. The coco coir isn't an afterthought. Coco coir holds eight to ten times its weight in water aerobically. Pair it with the wood layer below and you have two separate moisture-retention systems operating at different depths. The wood holds the deep reserve. The coco coir buffers the root zone. The plant sits in the middle and drinks from both.
The Cross-Section: What's Actually in There
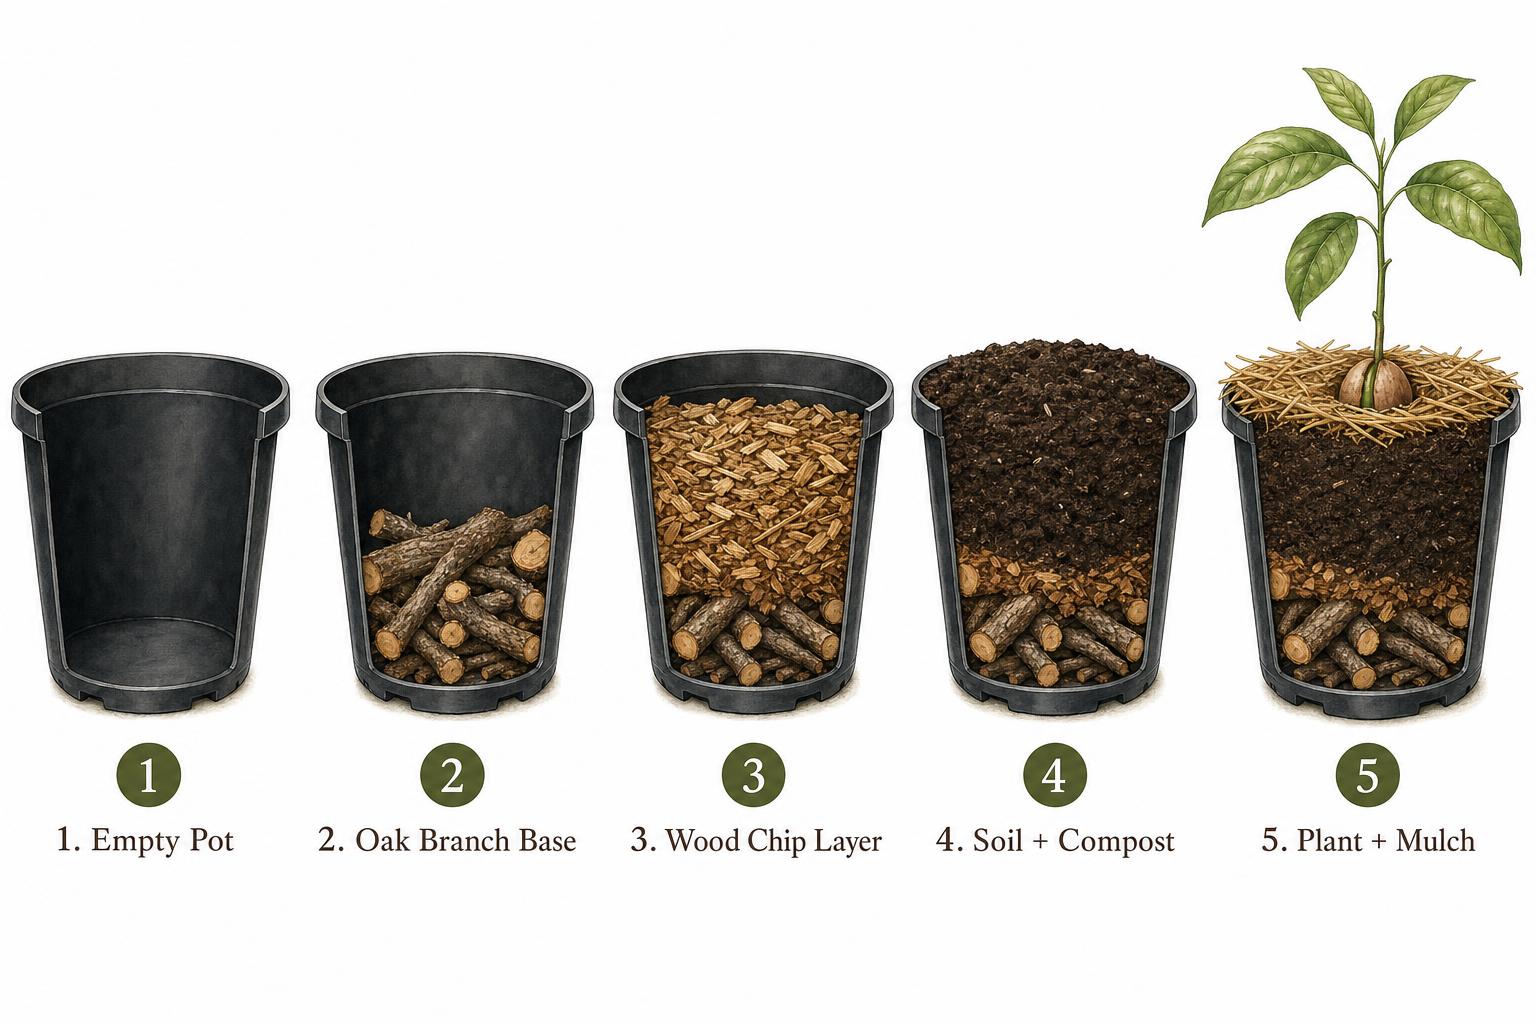
For the visual learners — and because I wish someone had shown me this diagram before I built my first pot — here's what a completed hugelkultur container looks like from the inside.
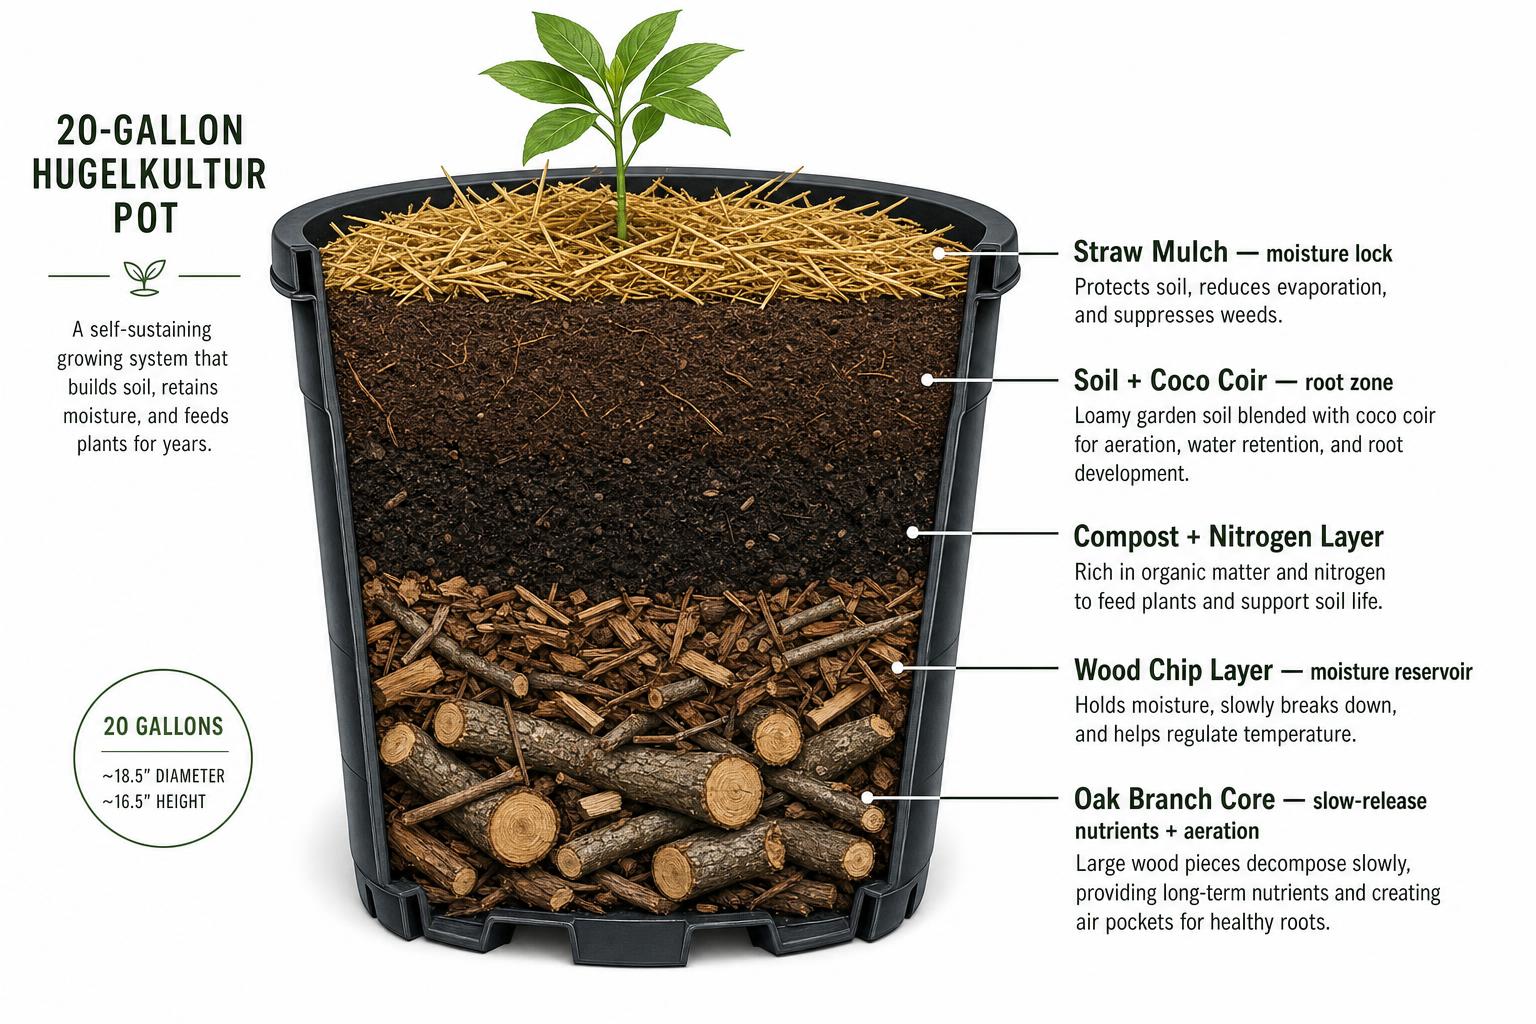
Five layers. Each with a distinct function:
Oak Branch Core — bottom 25–30% of the pot. Moisture reservoir. Aeration. Slow-release nutrient source as it decomposes over 1–3 years.
Wood Chip Layer — 10–15% of the pot. Bridges between the branch core and finer soil materials. Breaks down faster, adding nitrogen contributions within 6–12 months.
Compost + Nitrogen Layer — 15–20% of the pot. Immediate fertility. Feeds the plant in the first season while the wood is still establishing its microbial relationships.
Soil + Coco Coir Root Zone — 30–35% of the pot. Where roots live. Coco coir buffers moisture here so the root zone never fully dries between deep waterings.
Straw Mulch Surface — top 5%. Slows evaporation from the surface. Keeps the soil cooler. Prevents the baking-dry-crust problem that kills seedlings in California summers.
Planting the Avocados
Avocados are particular trees. They like things a specific way. Well-draining soil. Moisture consistency. No root rot. In the ground in a good Southern California spot, they'll tolerate some variation. In a pot, you're managing everything — and the margin for error shrinks.
Root rot is the number one killer of container avocados. Overwatering doesn't cause it directly. Waterlogging does. If the pot drains poorly — if water sits in the bottom — roots begin to suffocate. Phytophthora cinnamomi, the water mold that causes avocado root rot, thrives in anaerobic, saturated conditions.
The wood layer at the base of each pot changes this equation. Yes, the wood holds water — but it holds it in aerated cellular structures, not in standing puddles. When excess water reaches the branch layer, it drains through the air gaps between pieces while the wood itself absorbs what it can. The result is moisture without waterlogging. Humidity without hypoxia.
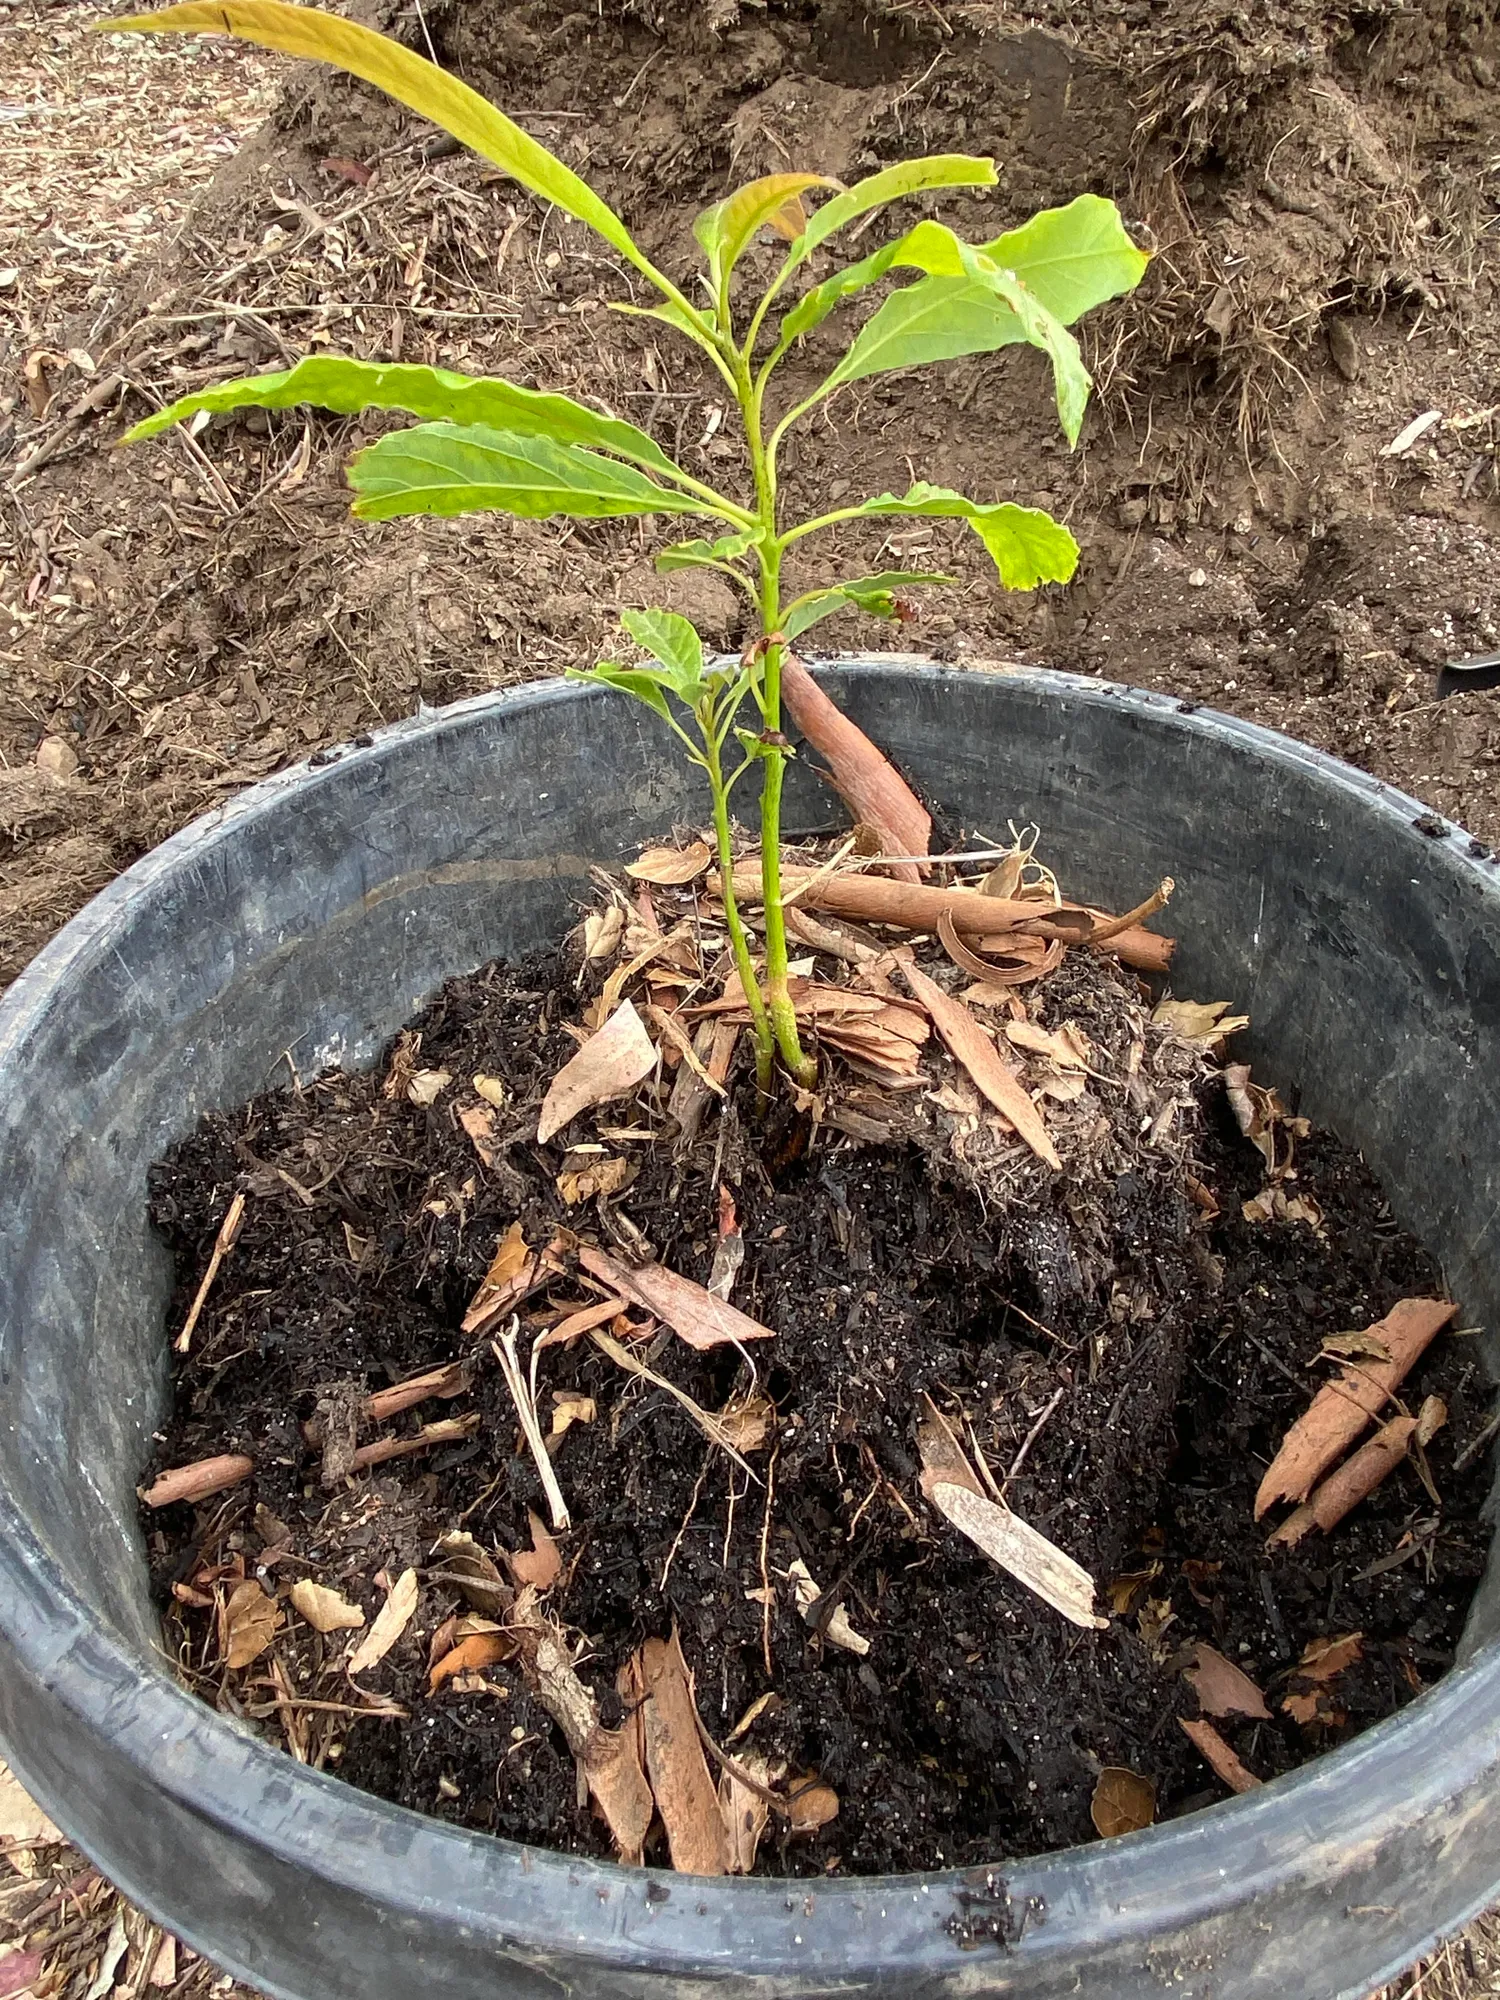
I planted each avocado at the same depth it had been in its nursery container. No deeper. Avocado crowns need air. I pressed the soil gently around the root ball, watered once to settle everything, and moved to the next pot.
The Moringa Experiment
Moringa oleifera is the opposite of avocado in almost every way. Where avocado wants consistent moisture and hates root rot, moringa is drought-adapted. Native to the Indian subcontinent, it evolved in dry, rocky, nutrient-poor soils. Its roots want to breathe. They want dry-wet cycles, not steady moisture.
The coco coir plugs I was starting them in were already doing something useful: they gave the seedling roots a moisture buffer during germination without suffocating them. Coco coir is aerobic even when saturated — water content goes up without oxygen content going down. When I transplanted the moringa from coco plug directly into the hugelkultur pot, that aerobic quality carried forward into the new root zone.
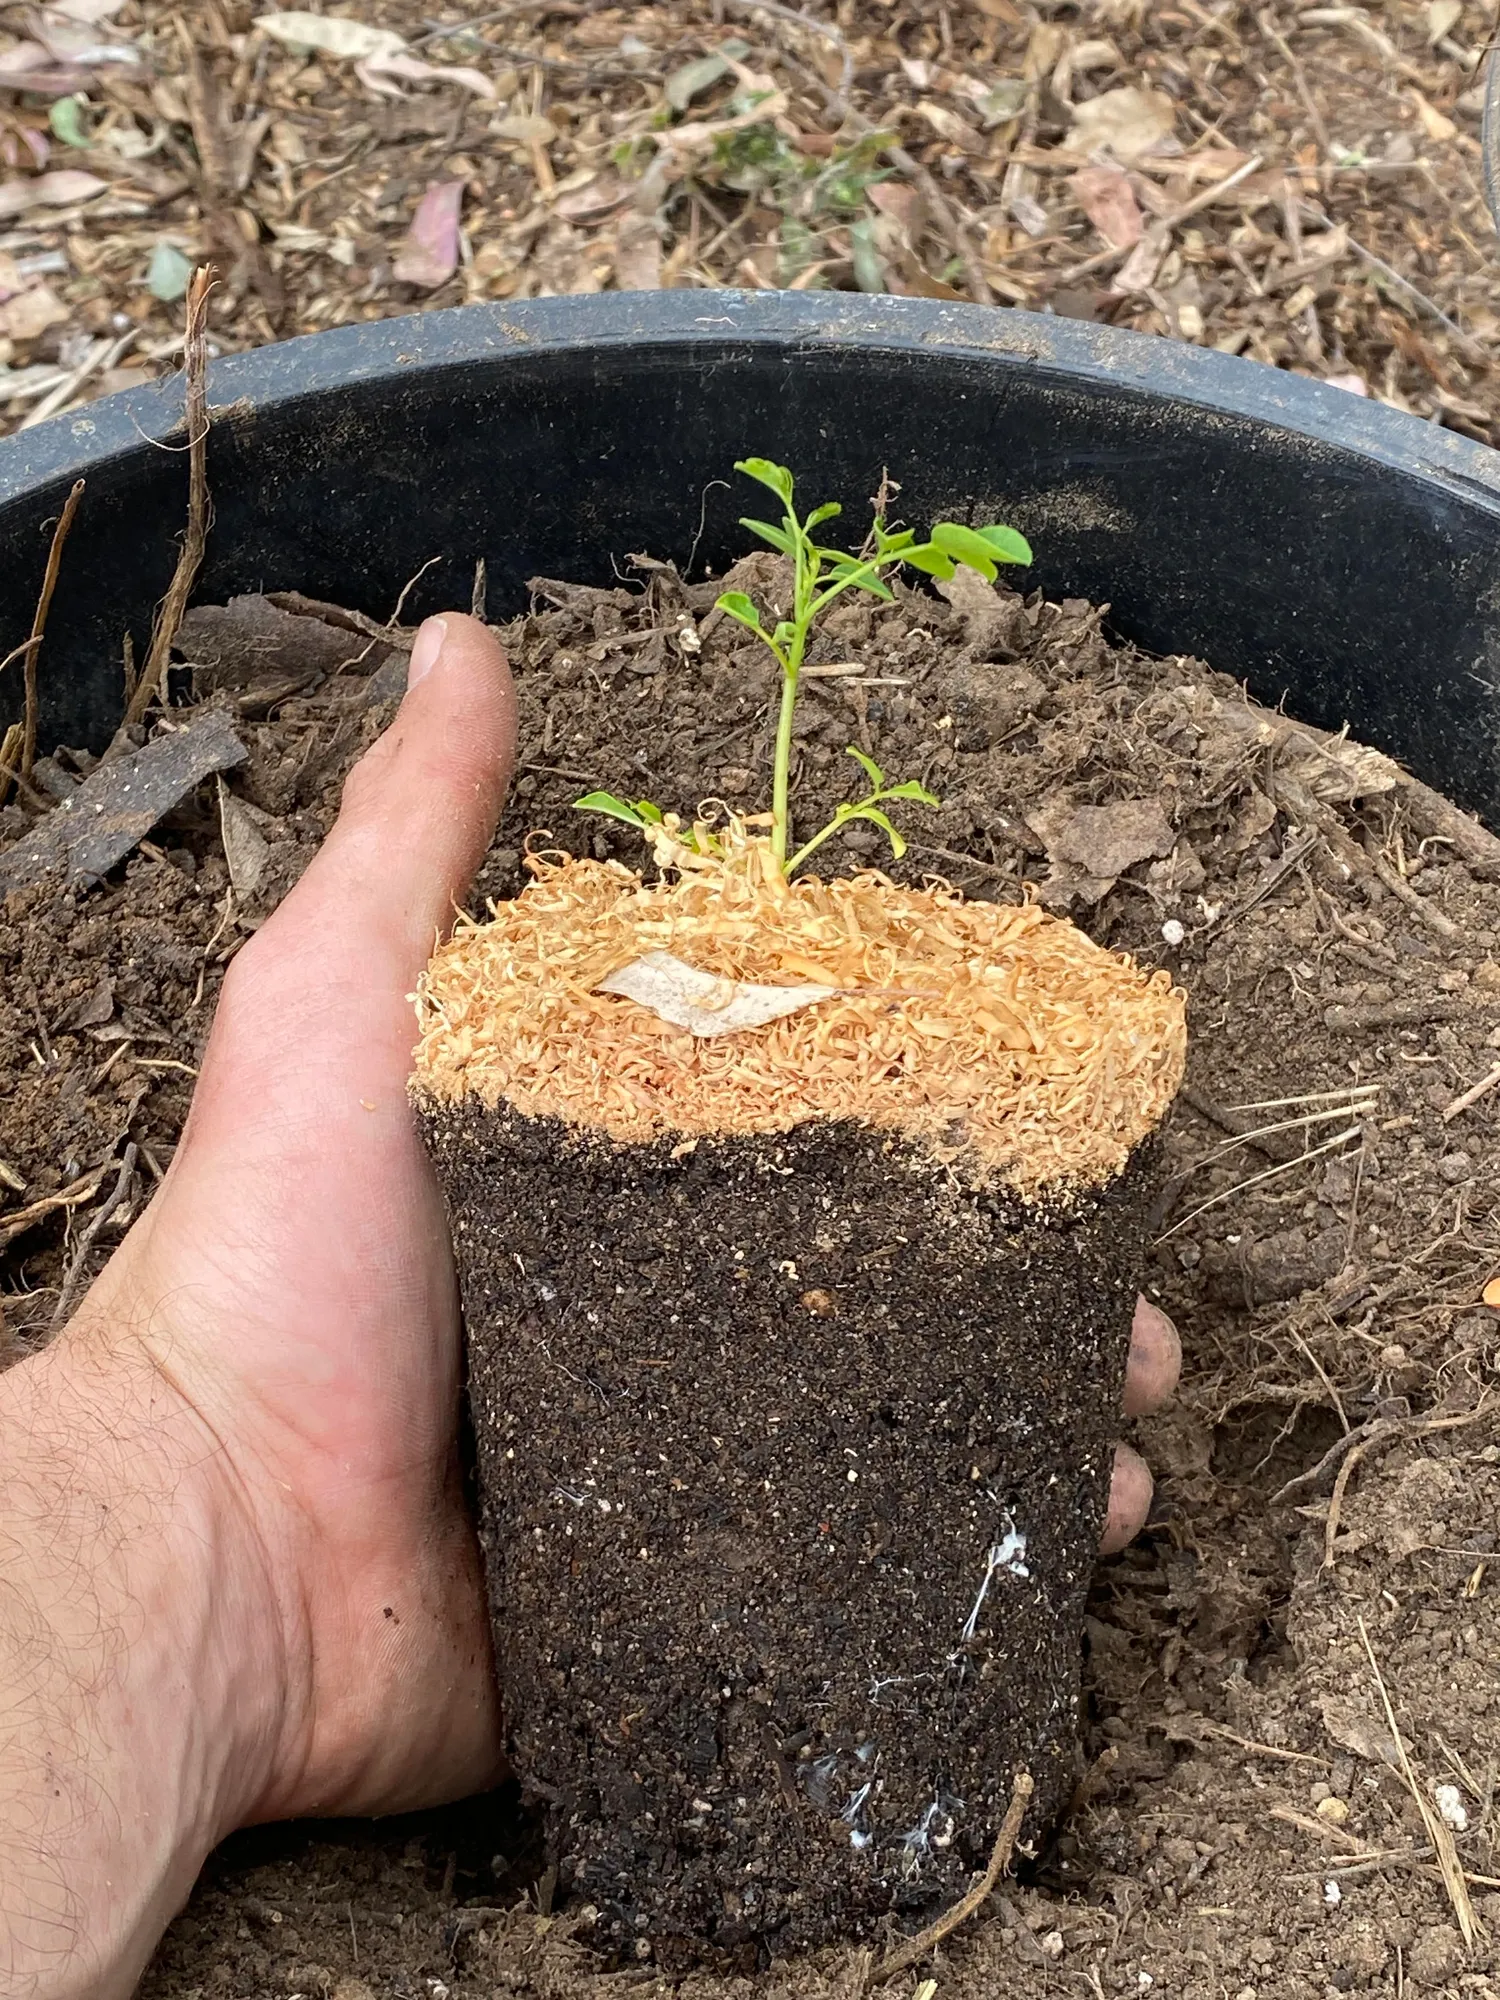
The moringa in hugelkultur pots also benefits from the gradual decomposition chemistry. As oak breaks down, it releases complex polyphenols and tannins. Initial decomposition is dominated by brown-rot and white-rot fungi. These fungi mineralize lignin and cellulose into simpler organic compounds that plant roots can access. For a nutrient-hungry fast grower like moringa — capable of putting on two feet of new growth in a warm week — that slow-release background fertility matters in the medium term, after the initial compost charge is spent.
Watch the Wood Drink
This is what's happening underground every time you water a hugelkultur pot.
That disappearing water is exactly what you want to see. It's not draining out the bottom. It's not sitting on the surface. It's moving into the wood. It'll come back out slowly, wicked into the root zone, long after you've stopped watering and walked away.
The "Nitrogen Lockup" Question (Let's Address It)
Anyone who has read about hugelkultur for more than ten minutes has encountered the nitrogen lockup concern. Wood needs nitrogen to decompose. If you bury fresh wood in soil, the decomposers — bacteria, fungi — pull nitrogen from the surrounding soil to break down the carbon-heavy wood. This temporarily reduces nitrogen available to plant roots.
The concern is real. It's also mostly about the wrong kind of wood.
Nitrogen lockup is a significant problem when you bury fine material: wood chips, sawdust, shredded bark, leaf litter, mulch mixed directly into the root zone. High surface area, fast decomposition, big nitrogen demand all happening right where your plant roots are.
Large branches are different. The ratio of surface area to volume is dramatically lower. Decomposition is slow — measured in years, not months. The nitrogen demand is distributed over that entire timeline, not concentrated in the first growing season. Meanwhile, because the branches are buried below the compost and soil layers, the decomposition activity is happening at a distance from the active root zone.
Practically: if you're planting annuals with shallow roots directly over freshly buried chips, you might see nitrogen deficiency. If you're planting trees with developing root systems over thick oak branches buried under six inches of compost and loamy soil, you almost certainly won't notice it.
I watched for yellow lower leaves (the classic nitrogen deficiency signal) in the first weeks after planting. I saw none. The compost layer above the wood is providing more than enough available nitrogen for the seedlings to establish.
How to Build One Yourself
You don't need a property. You don't need in-ground beds. You need a pot, some branches, and the willingness to layer things in the right order.
What You Need:
- A container with drainage holes — minimum 5 gallons, ideal 15–20 gallons for trees
- Thick branches or logs — oak, fruit tree prunings, willow, alder, or any hardwood. Avoid walnut (contains juglone, which inhibits growth), pine resins in high quantity, and anything diseased
- Wood chips (optional but helpful as a transition layer)
- Compost — as dark and earthy as you can get
- Good potting mix or garden soil
- Coco coir (optional, but highly recommended)
- Straw or leaf mulch for the surface
The Layers (Bottom to Top):
-
Wood base — fill the bottom third of your pot with the thickest branches you have. Chunk them if needed. Fit them loosely so there are air gaps. Don't pack them tight.
-
Wood chips — if you have them, add 1–2 inches over the branches. If not, skip this and add extra compost.
-
Compost — generous layer, 3–4 inches. This is where most of your plant's first-year nutrition comes from. Don't skimp.
-
Soil + coco coir — your main growing medium. Mix coco coir at roughly 20–30% by volume if you have it. Fill to 2–3 inches below the rim.
-
Plant your tree or seedling. Firm in. Don't bury the crown.
-
Straw mulch — a thin layer over the surface. Leave space around the stem so it doesn't rot.
-
Water deeply. First watering is important — you're wetting the wood for the first time, activating the absorption mechanism. Water until it runs from the drainage holes.
After That: Water less frequently than you think you need to. The wood is buffering. Feel the soil 2–3 inches down before watering again. In my experience, hugelkultur containers need 30–40% less frequent watering than conventional containers from the first week.
Six Weeks Out: What I'm Seeing
At the time I'm writing this, we're a few weeks past transplant day.
Not a single avocado has shown stress. No wilting in the afternoon heat. No yellowing leaves. A few are already showing new growth — that pale, almost luminescent green of a leaf that just decided to exist.
The moringa is doing exactly what moringa does when it's happy, which is grow aggressively in every direction. One of them has pushed four inches of new stem since transplant. It doesn't know it's supposed to be in a pot.
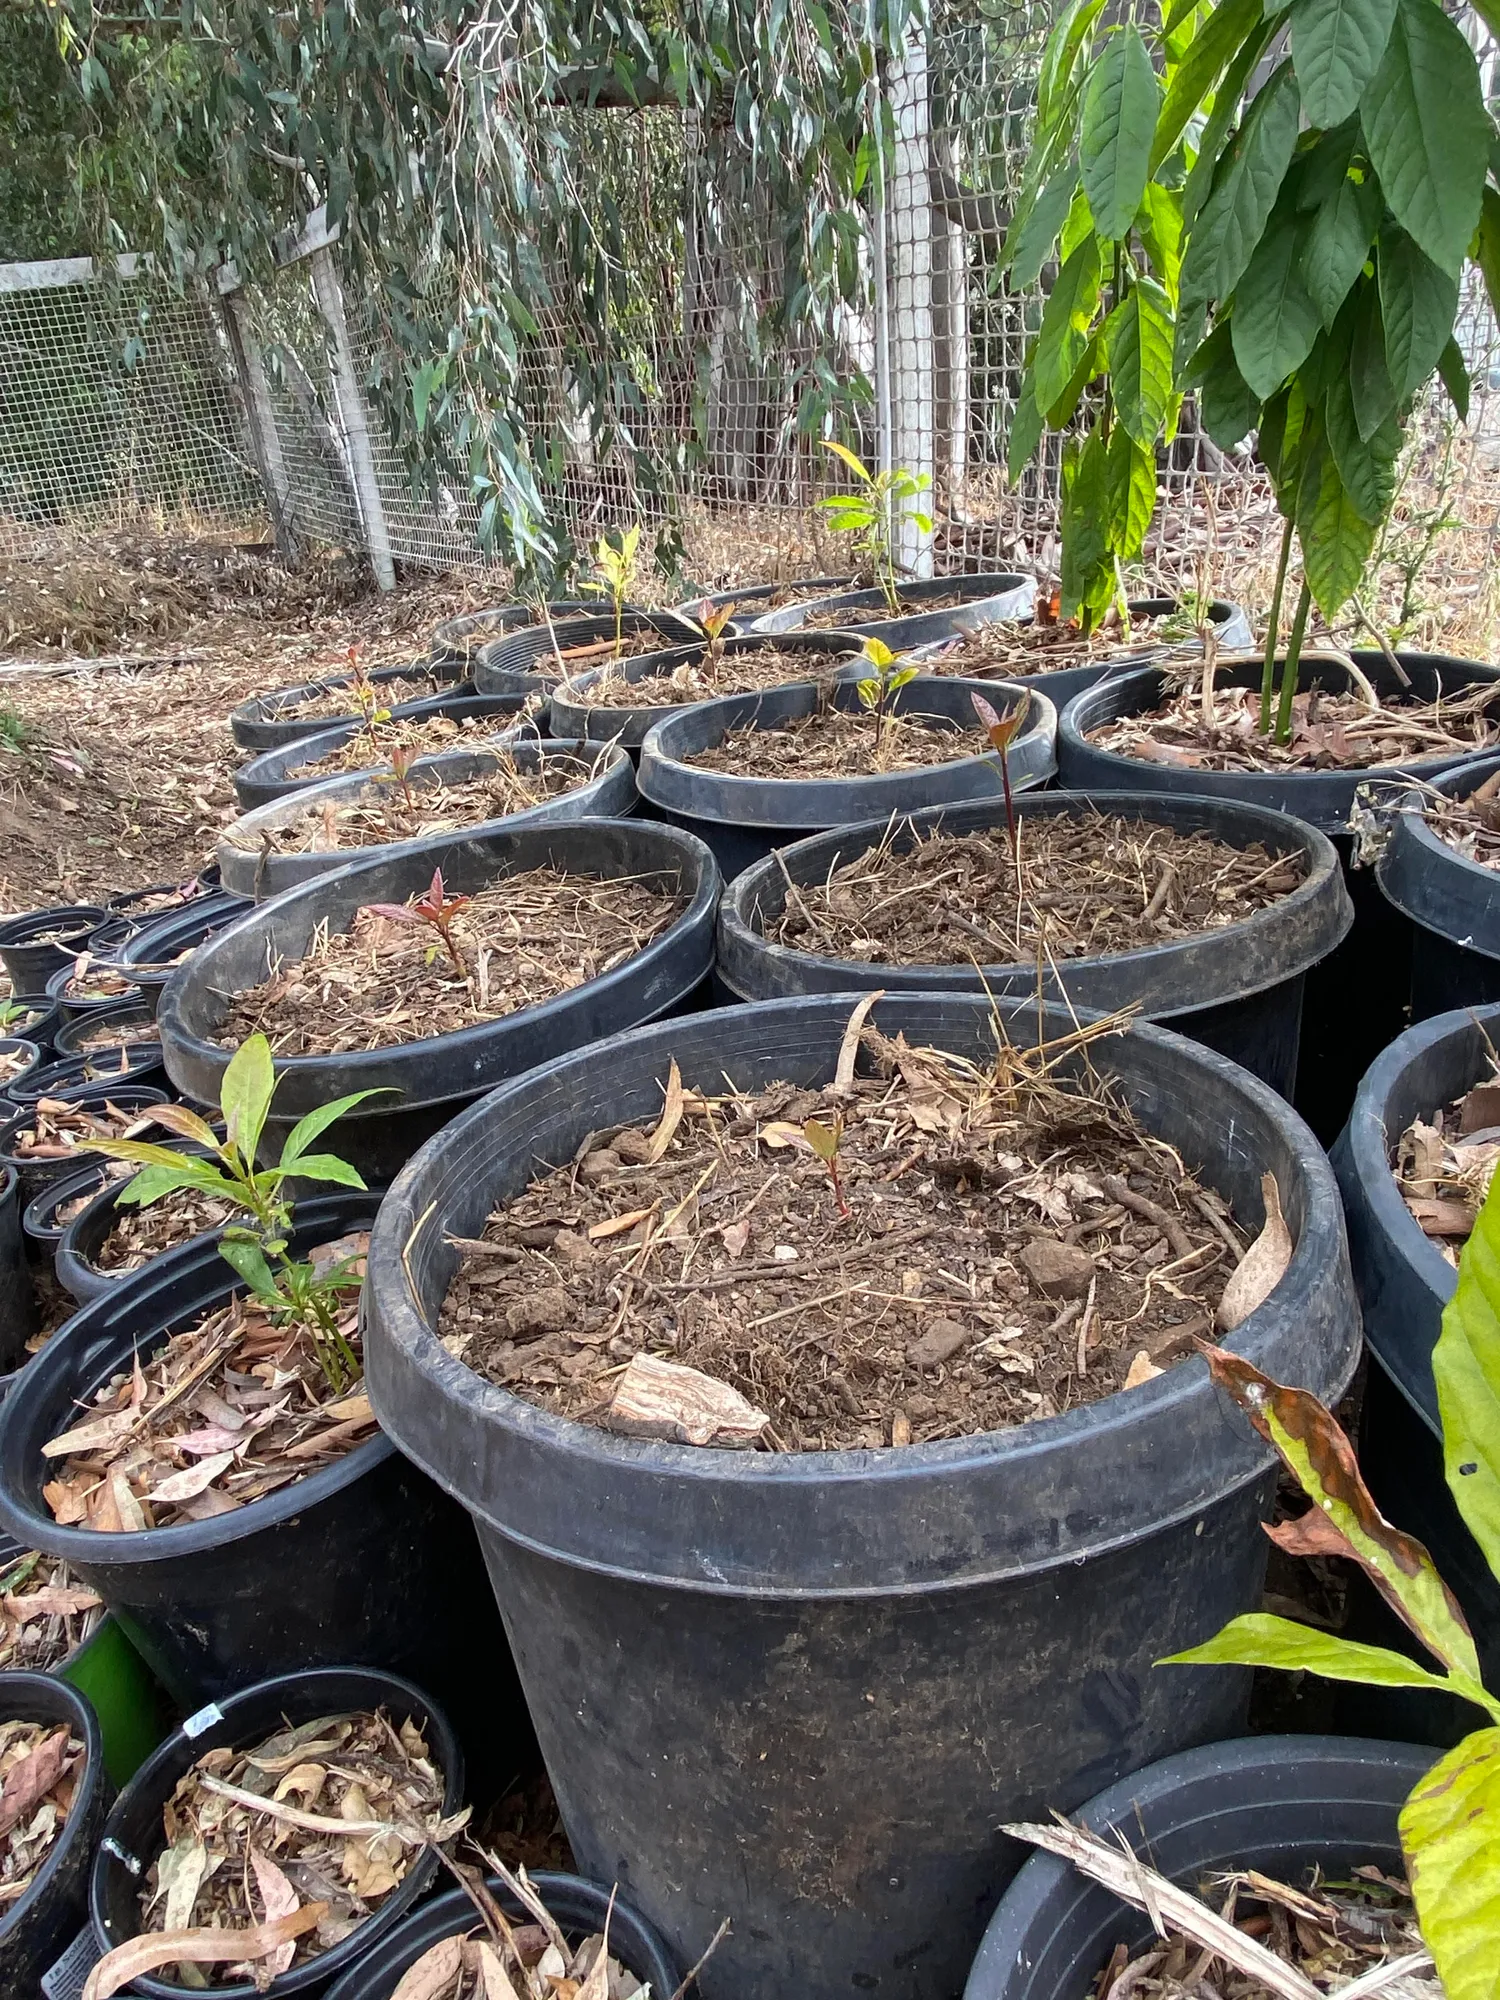
I water every four to five days now, even in the heat. In conventional containers, I'd water every two to three. That difference is the wood, working underground where I can't see it, doing exactly what it was always designed to do.
This Is Ancient Technology
I want to say this clearly, because the word "permaculture" sometimes makes people imagine something inaccessible or complicated.
Hugelkultur is not a hack. It's not a trend. It's something humans have known about for centuries and largely forgotten in the age of synthetic fertilizers and automatic irrigation.
The idea that you can turn wood — material you would otherwise discard — into a moisture reservoir and slow-release fertility system is not a discovery. It's a recovery. We're remembering.
And you can do it in a fifteen-gallon pot on a balcony.
You don't need land to practice land-based wisdom. You need curiosity and the willingness to think in layers.
The Long Game
Here's what I'm watching for over the next 12–18 months:
As the wood decomposes, the pot substrate will slowly consolidate. The branches compress. The layers settle. I'll top-dress with compost periodically to compensate. The settling is a feature, not a bug — as decomposition accelerates, microbial diversity in the pot increases. Mycorrhizal fungi colonize the wood surface. Nematodes. Protozoa. The soil food web filling in around an underground structure.
By year two, these pots should need almost no supplemental fertilizer for the trees. By year three, if the decomposition is proceeding well, the wood will have contributed enough organic matter that the soil texture will be genuinely different — darker, more aggregated, more alive.
In a conventional pot with conventional potting mix, that same tree would be in a declining fertility trajectory by year two. The peat breaks down. The perlite is still there but the organic fraction is gone. You either repot or you fertilize constantly.
The hugelkultur pot goes the other direction. It improves.
That's the design philosophy behind all of this, underneath all the layers. You're not maintaining a static system. You're building a dynamic one. You're creating conditions that get better with time, not worse.
Recommended Resource
Ready to Build Your Own Container Forest?
The tools and systems I've used to build productive, water-efficient container gardens — from soil amendments to container selection to companion planting strategies. This is the most practical guide I've found for people who want real food production without a big yard.
Learn More →Download the Eden Backyard Starter Kit
Everything you need to transform your backyard into a productive system — free.
- Complete garden layout plans
- Seasonal planting schedules
- Soil preparation guides
- Water-saving techniques
- Natural pest control methods
Free — no credit card required